Wells
This module has the following functionalities:
1. Filtering And GIS
1.1.Filter Well List
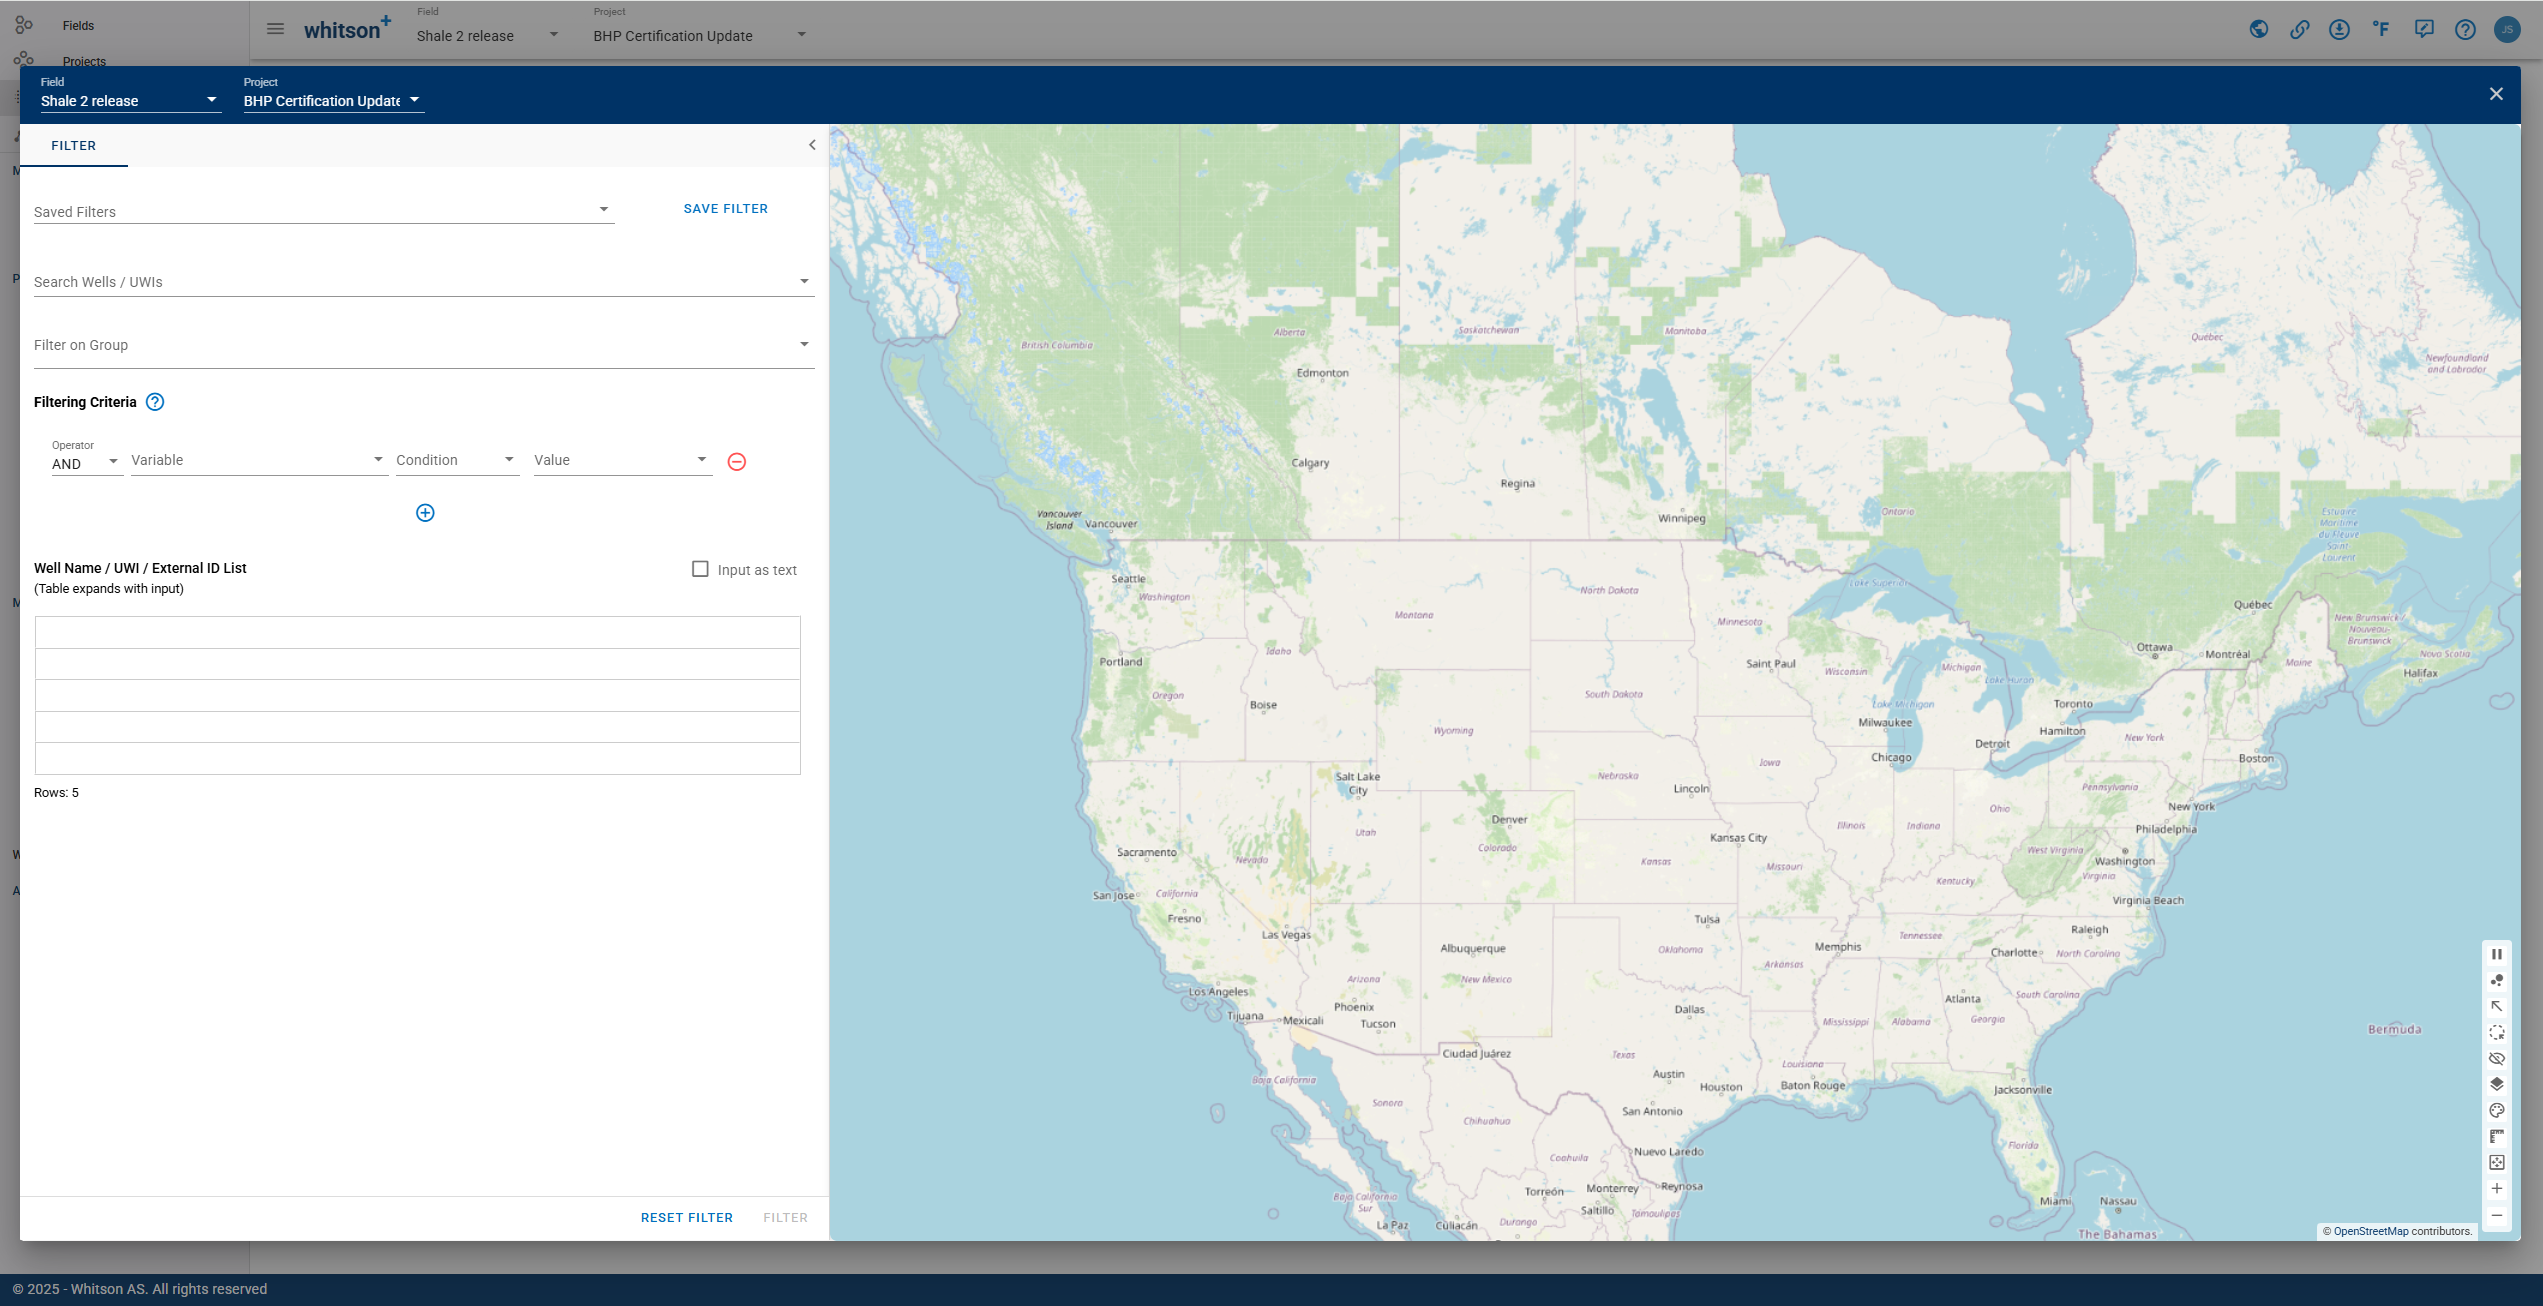
Allows you to filter wells based on different criteria:
-
Search Wells / UWI: To filter by well name or unique well identifier.
-
Filter on Group: To filter wells based on user-created groups.
-
Filtering Criteria: To filter wells based on a condition that a variable meets.
- Variable: Selected from a drop-down list and includes variables related to well information & inputs, reservoir properties, completion metrics and well location information.
- Condition: Available conditions depend on the type of variable selected:
- Text variables (e.g., Well Name, UWI) support conditions such as Contains (default), Not Contains, Inside, Outside, Equal to (=) and Not Equal to ().
- Numeric variables (e.g., Lateral Length, Depth, Pressure) support conditions such as Range, Equal to (=), Not Equal to (), Less than (<), Greater than (>), Less than or equal to () and Greater than or equal to ().
- Value: The value associated with the condition.
-
Well Name / UWI List: There are two filtering options. You can copy and paste a list of wells in a table format (the table will automatically expand to fit the data). Alternatively, you can copy and paste a list of wells as text, separated by commas.
Warning
RESET FILTER to remove all filters and see all the wells in the project.
Remember
- Activating a filter applies it consistently across all modules.
- The filter symbol turns blue to indicate that there is a filter applied to the project.
1.2. GIS Map
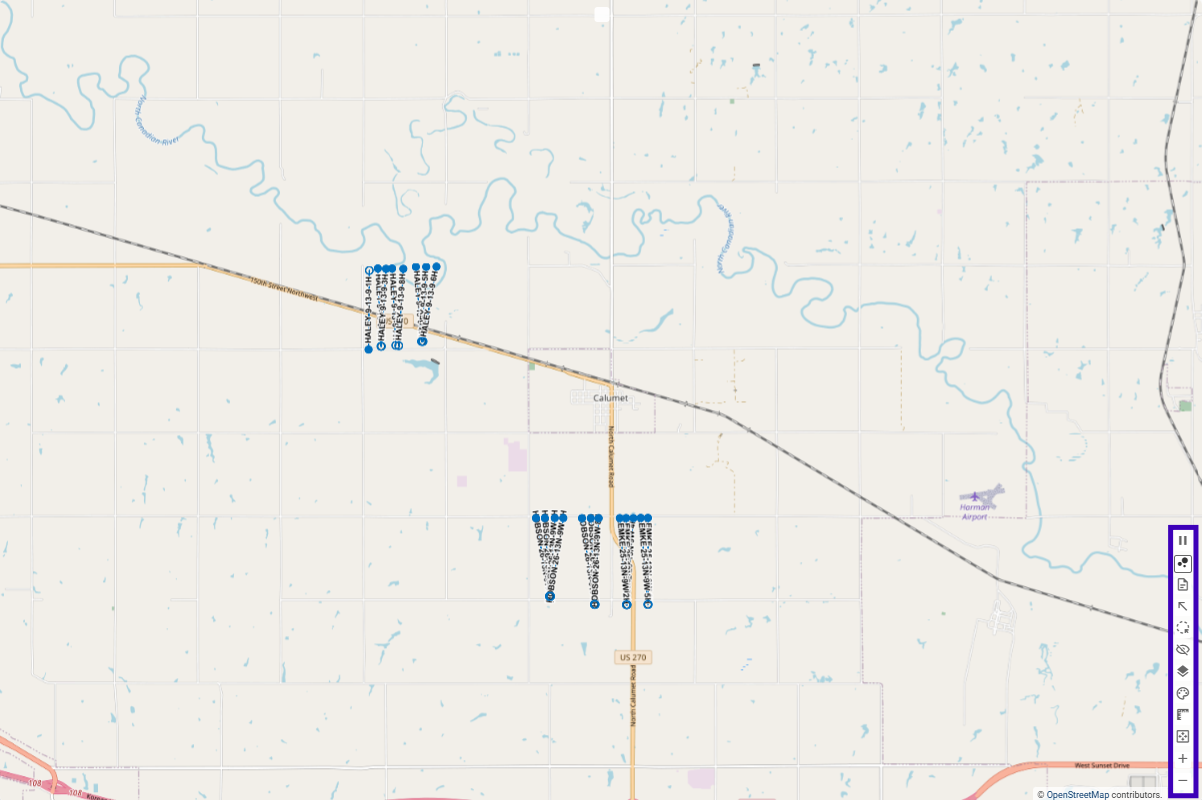
The GIS Map's main functions are listed below in order:
-
Pause Map: Temporarily disable the GIS map. Click this button again to restore it.
-
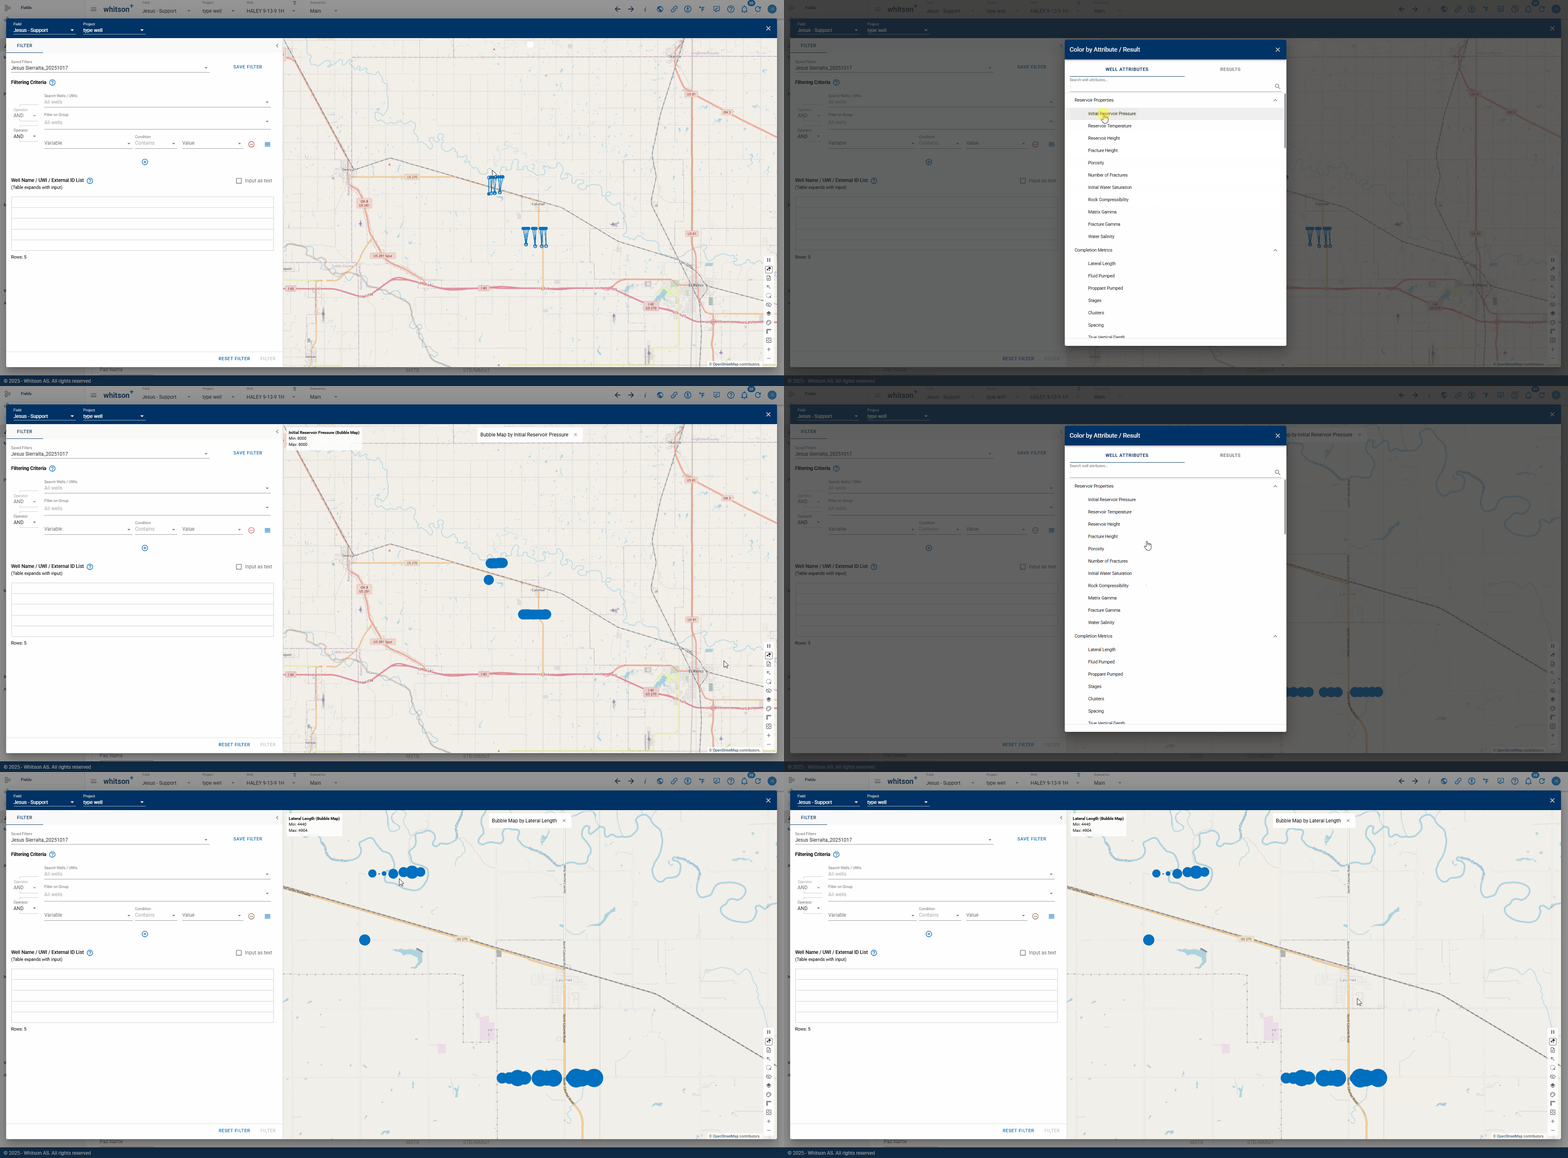
Spatial Map: Select an attribute or result to display on the map as a bubble map. The legend in the top-left corner shows the minimum and maximum values. Larger circles represent larger values; smaller circles represent smaller values. See the GIF below for the steps.
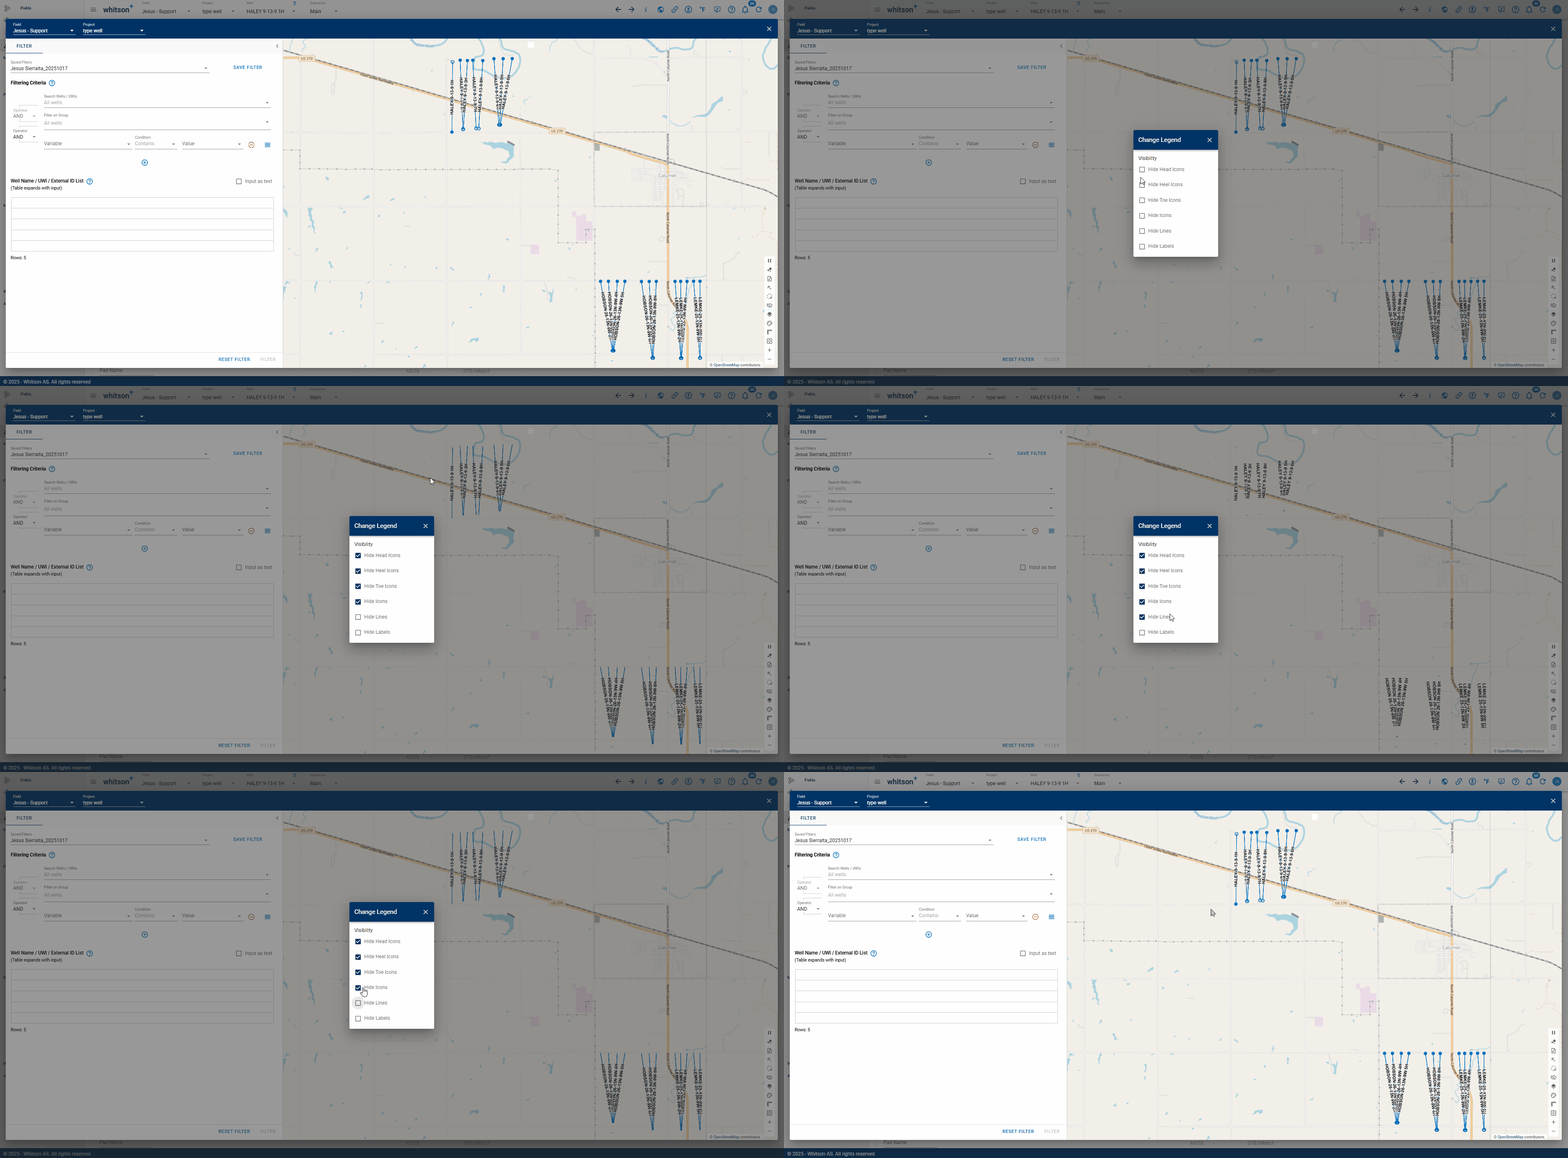
- Change Legend: Choose which icons and lines to display on the map. This includes plotting heel (open square) and toe (filled circle) coordinates, with customizable settings for coordinate visibility and path display. See GIF below for a demonstration.
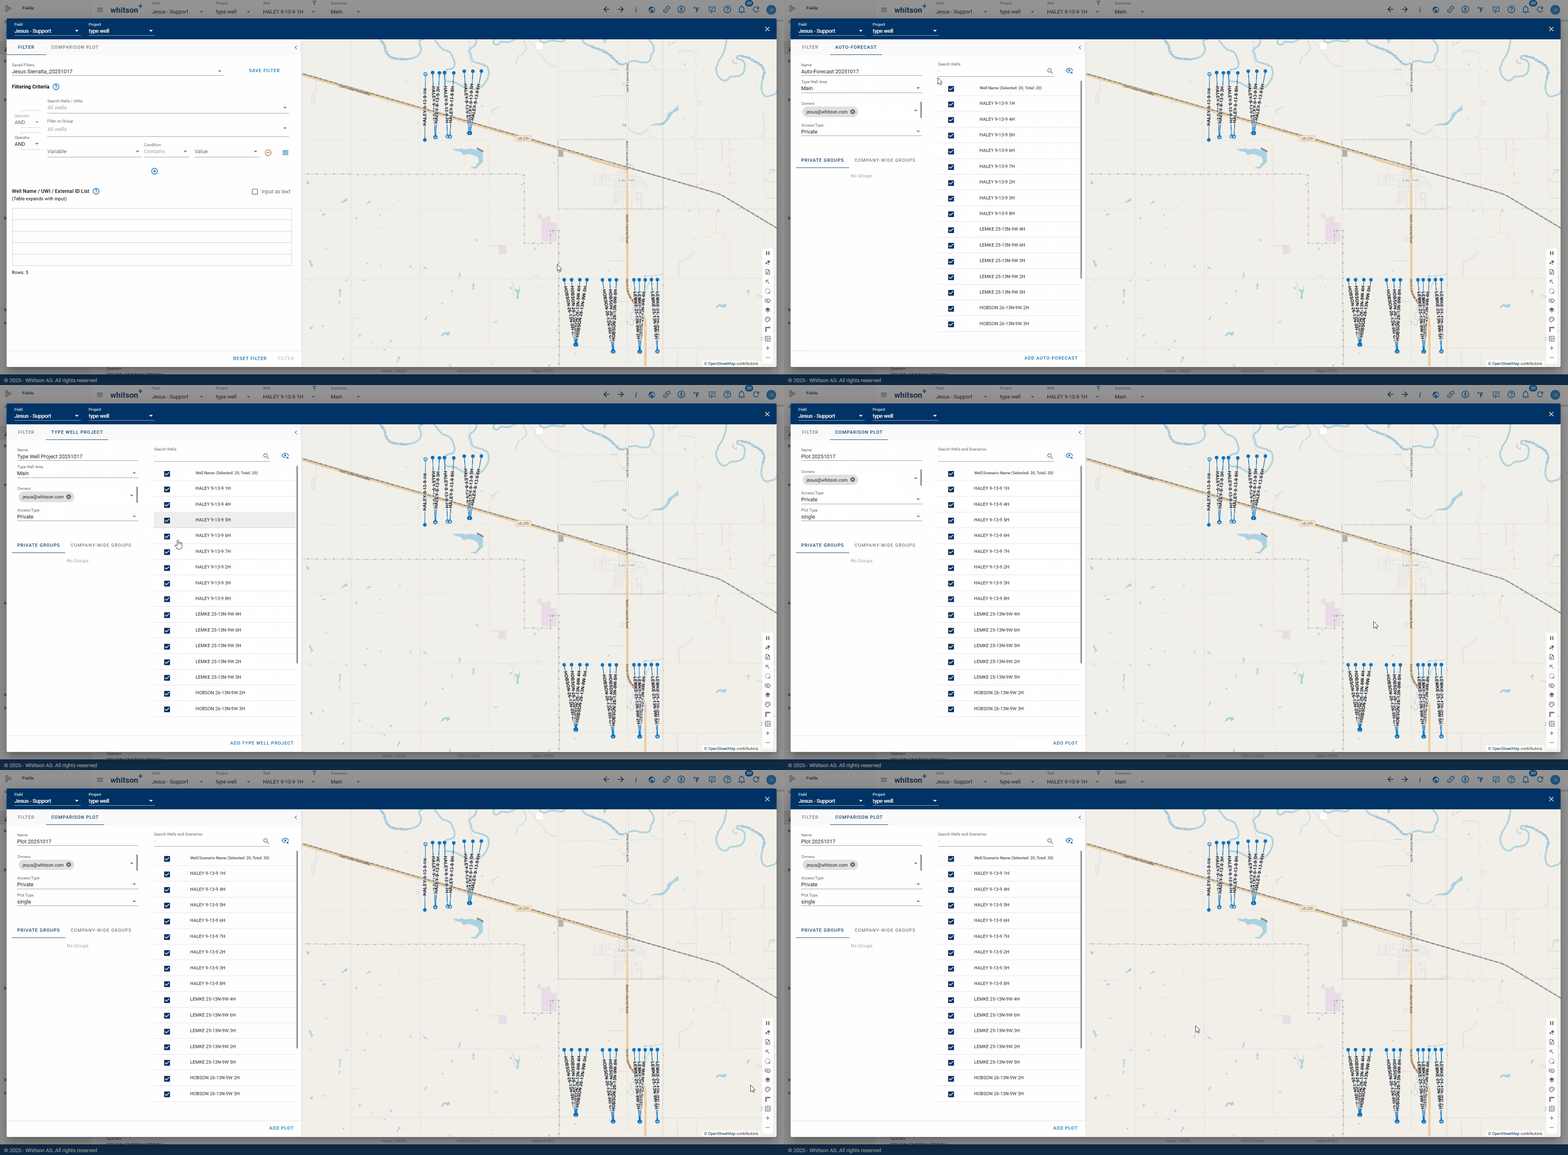
- Actions: Jump straight into creating an analysis, grouping wells, or making copies using the wells in your project. For more information on each analysis, see its section of the manual.
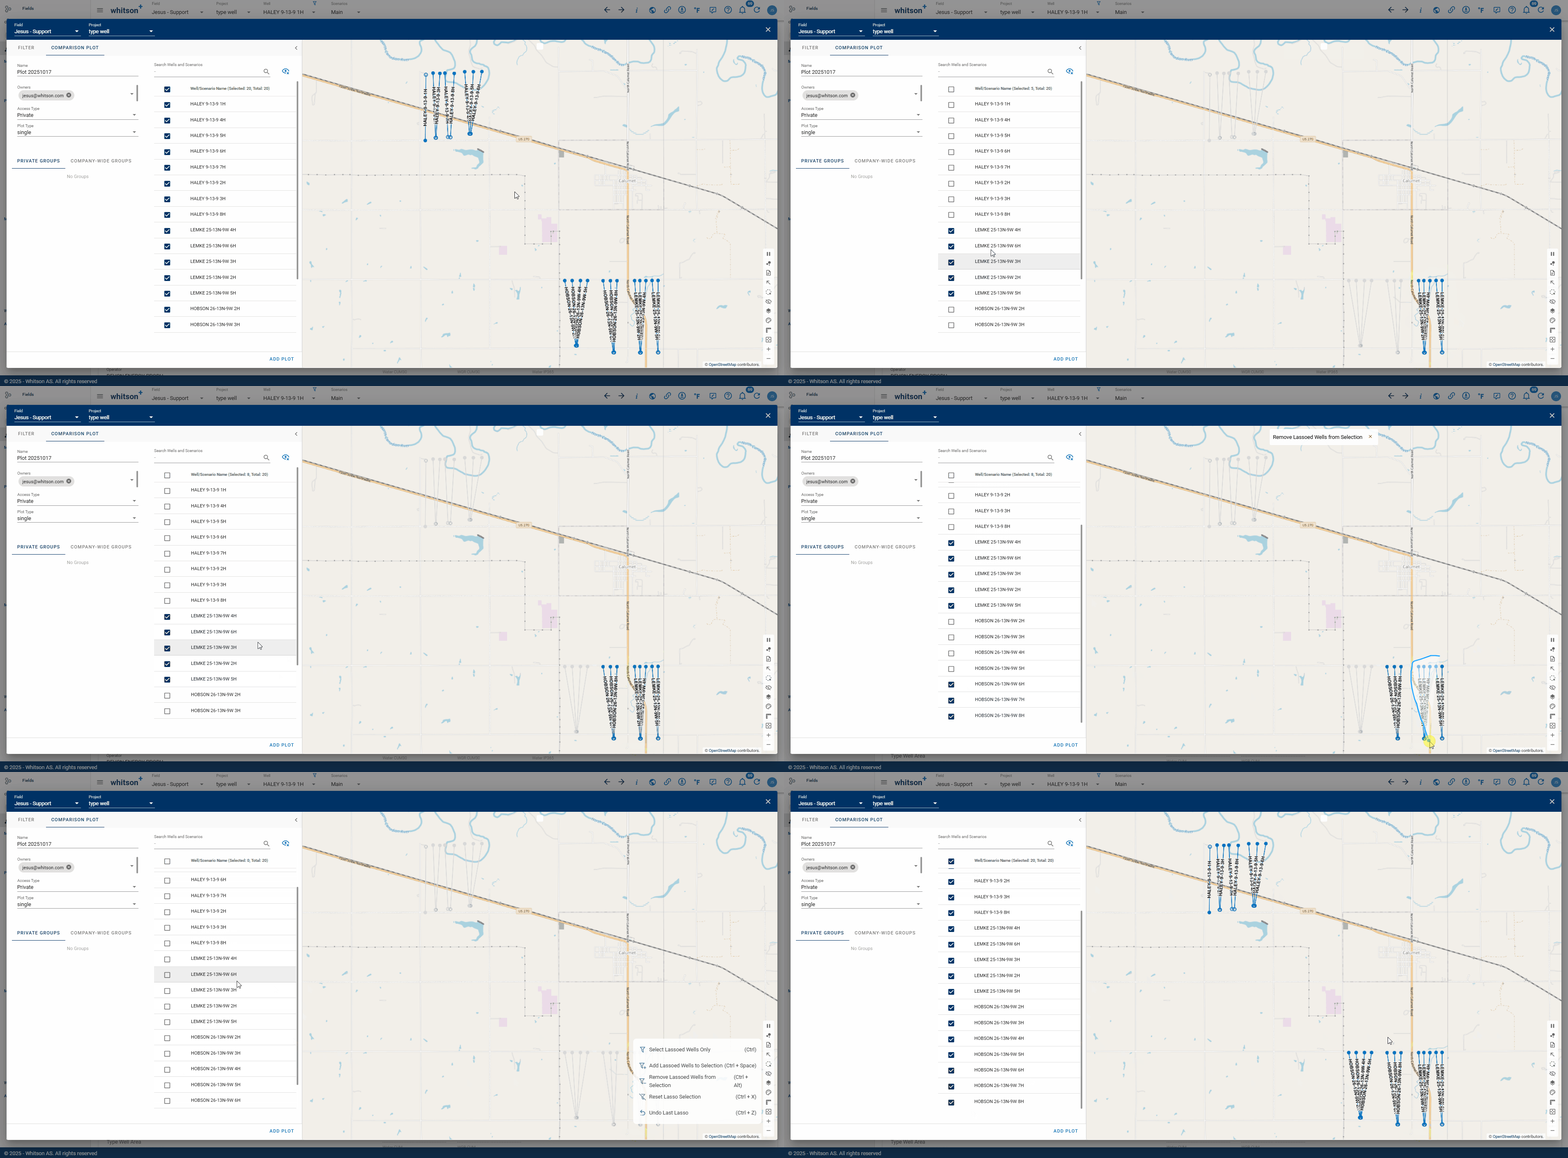
- Lasso Wells: Use lasso tool to select wells in your project. The different features of the tool are shown in the GIF below.
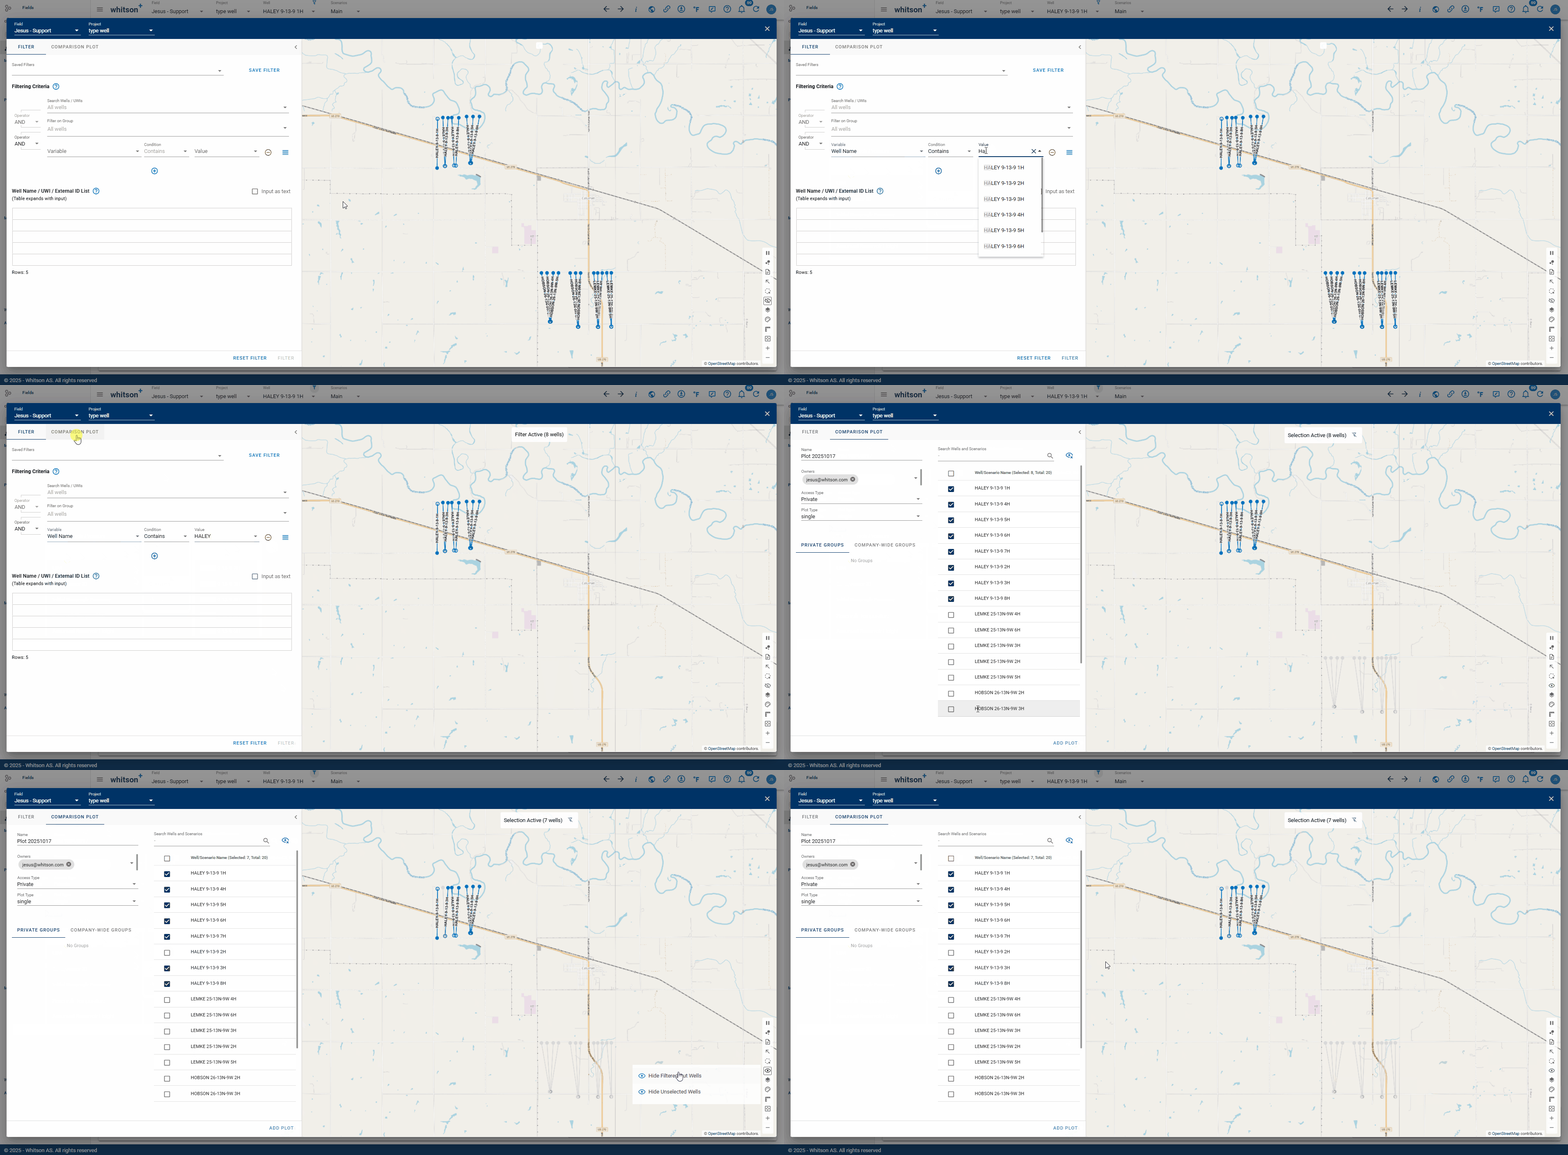
- Hiding Tool: Use this button to show wells that were previously filtered out or unselected on the map.
- Layer Overview: Select a field to outline on the GIS map. To import your own layer, click "Add New Layer", enter a name, then drag and drop your file. Make sure the file is a WGS84 shapefile.
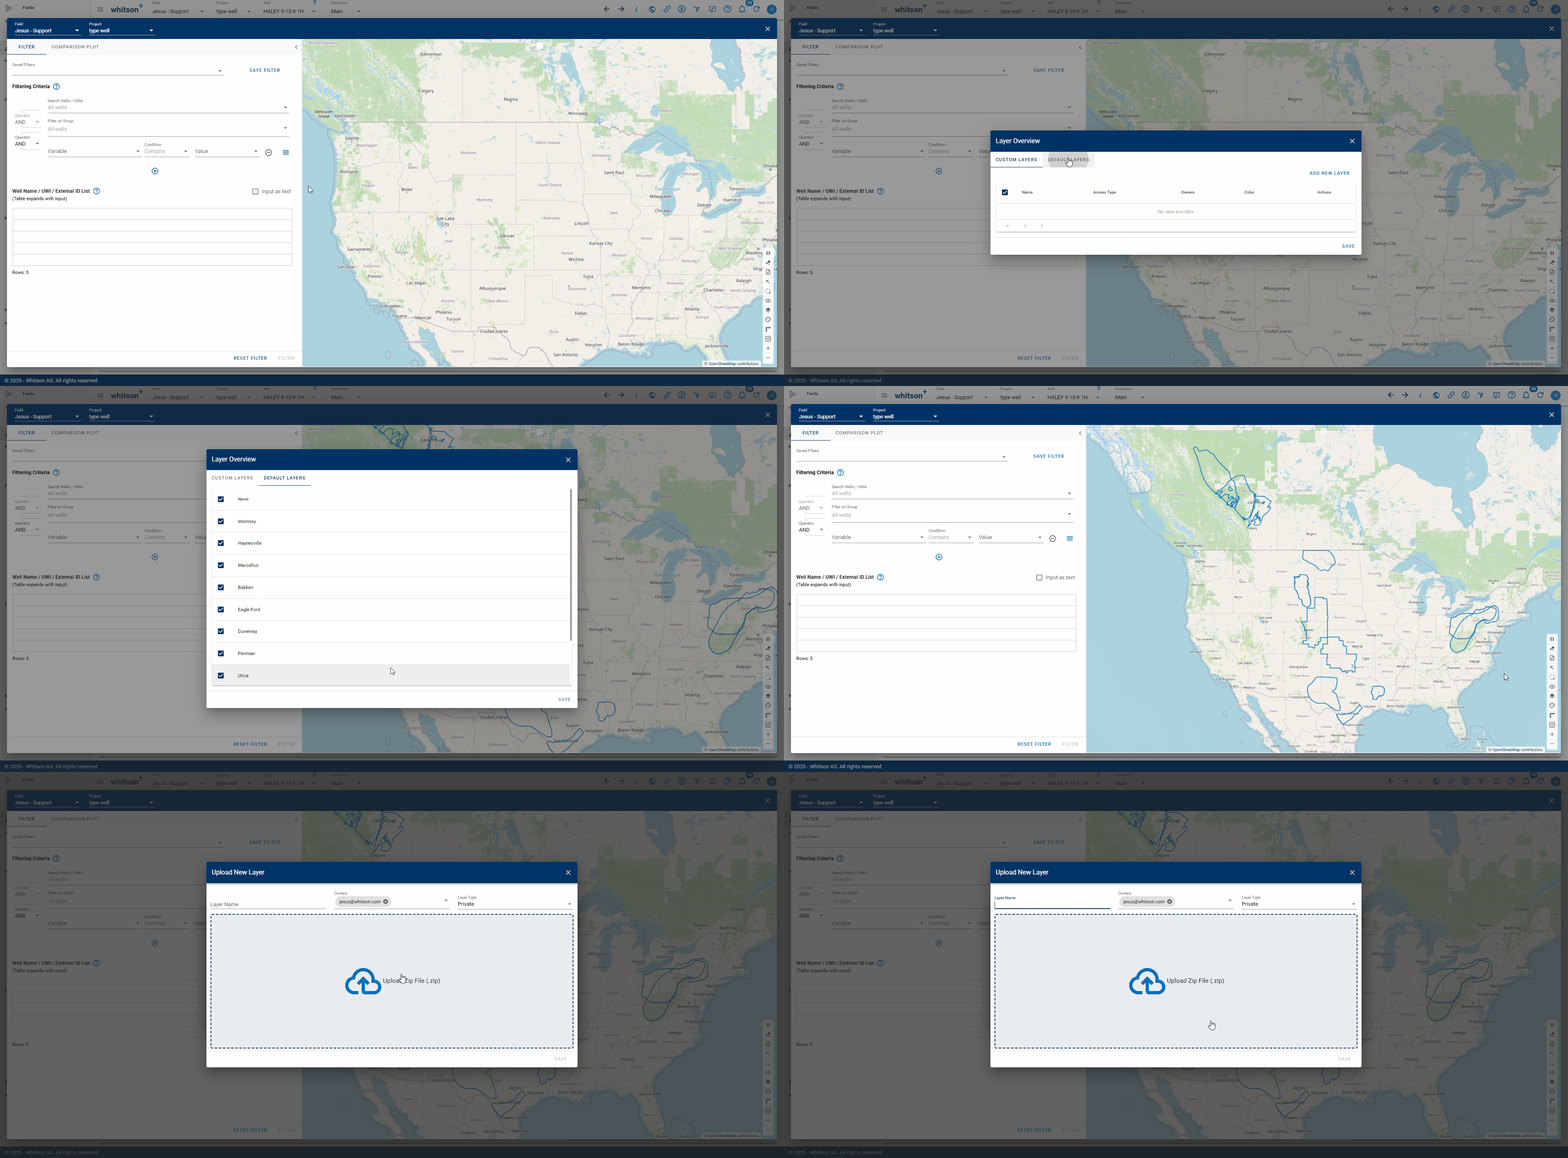
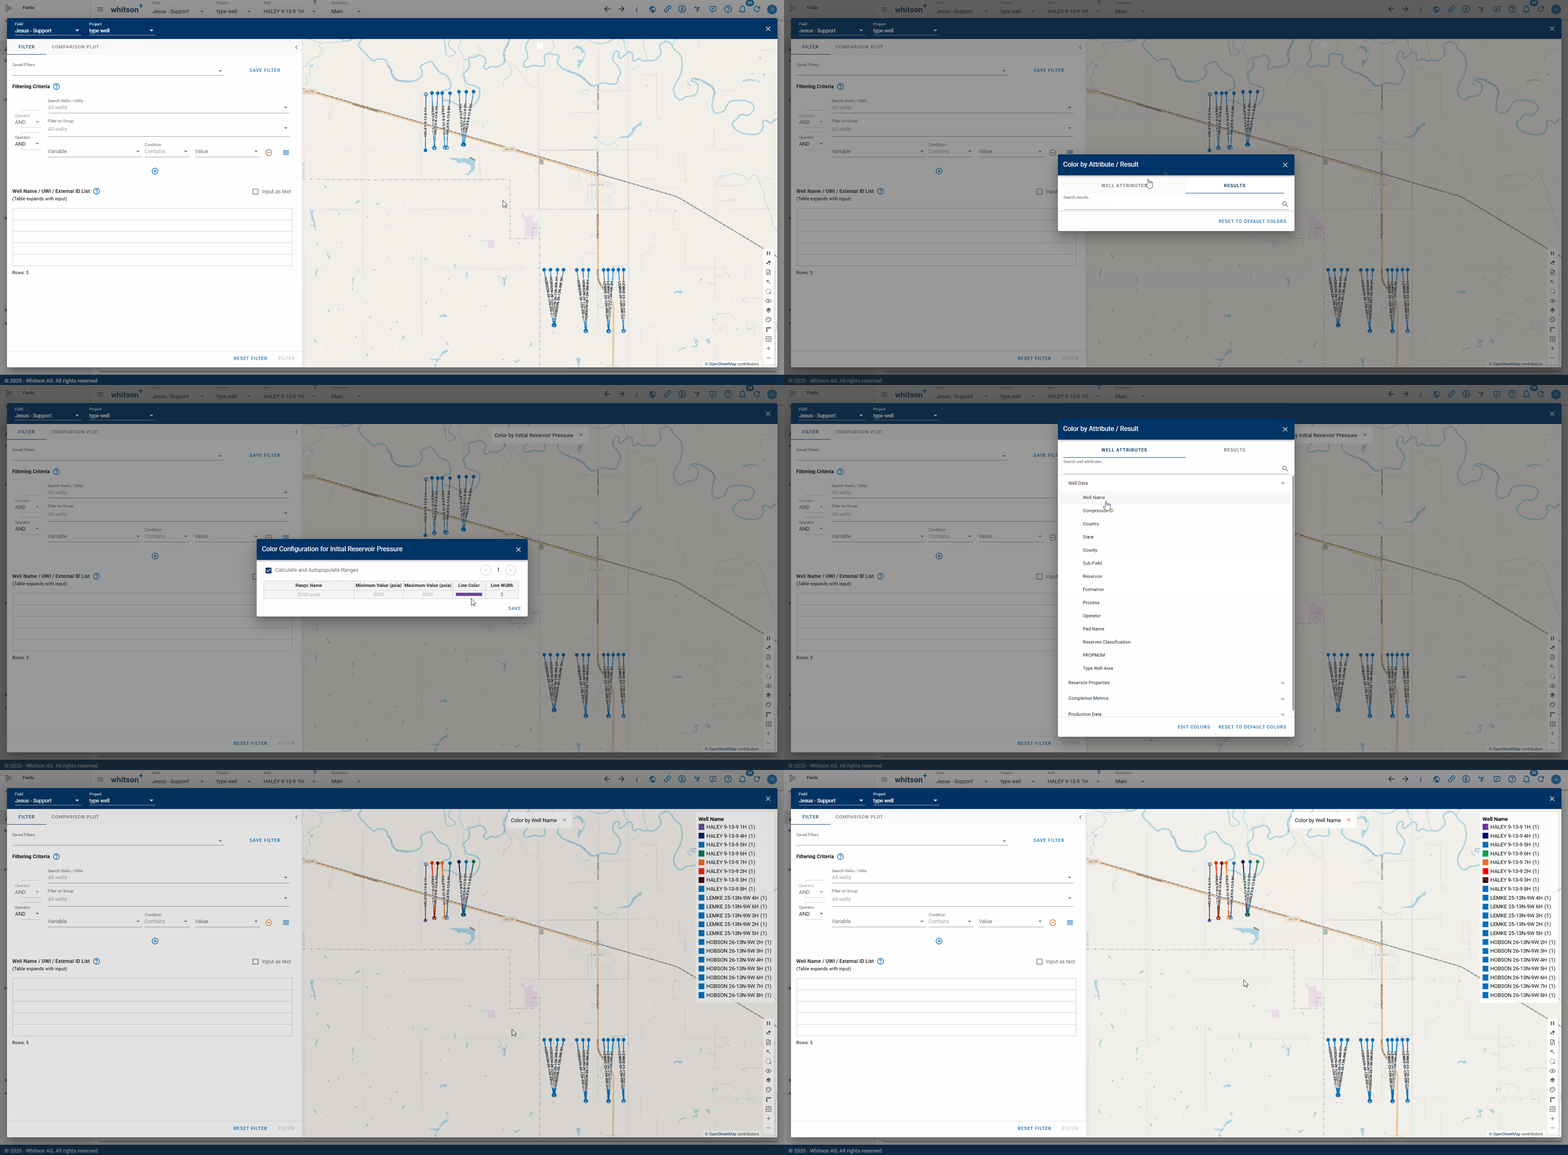
- Change Colors: Choose an attribute or result to color by from the lists shown in the GIF below. You can also edit previously selected colors or reset to the default colors.
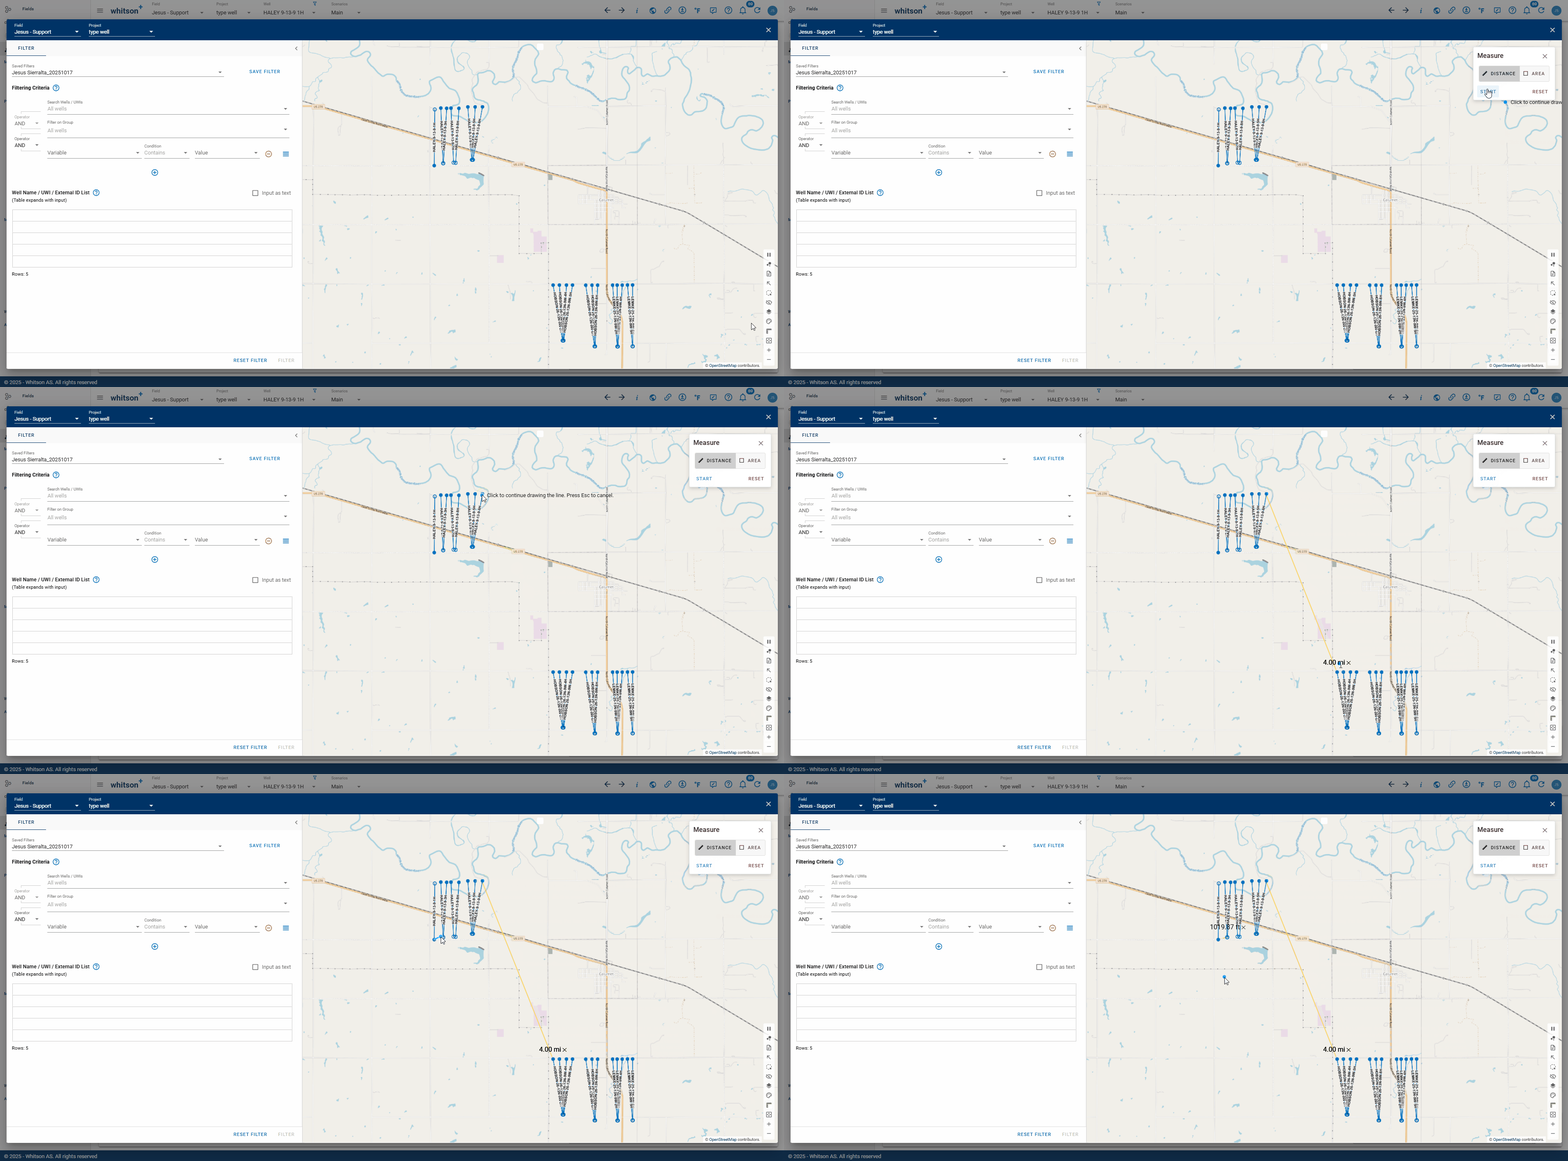
- Measure Distance: Place points to measure distances, or draw a shape to calculate the enclosed area.
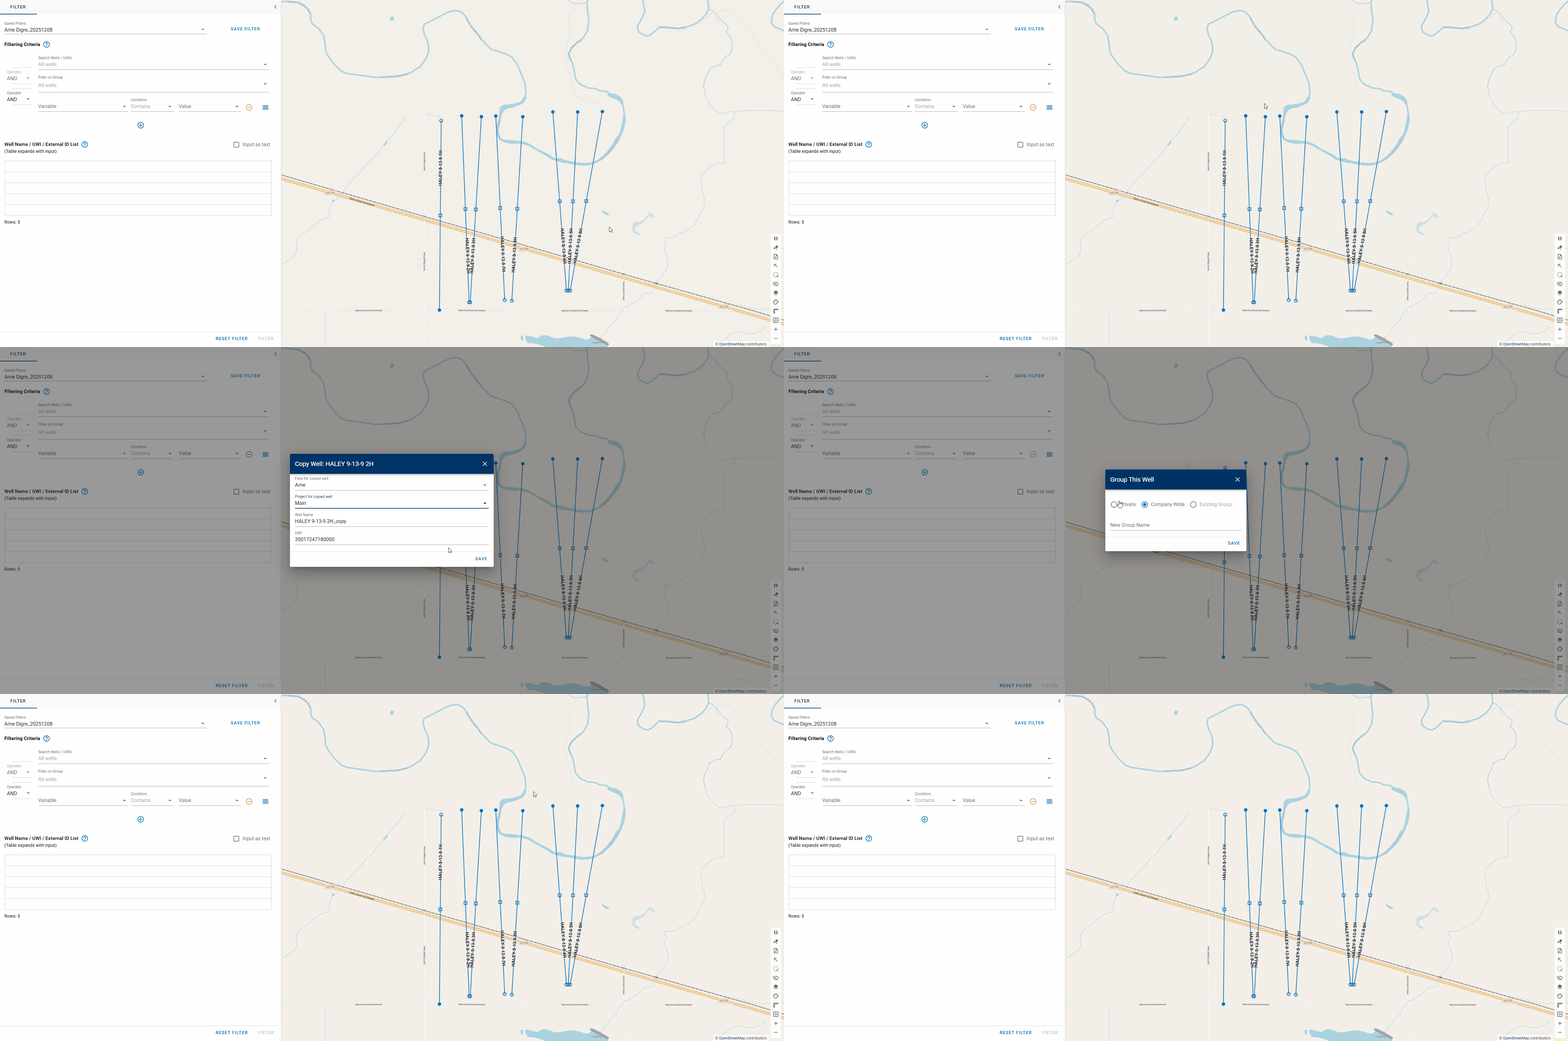
- Well Overview: Hover over a well displays an overview information: well name and UWI. Click on the well to access additional options and actions such as:
- Well Info: Opens the scenario page for the selected wells.
- Copy Well: Copies the well to an existing project
- Add to Group: Adds the well to a new or existing group.
- Toggle in Lasso: Selects the well for filtering
2. Sort Well List
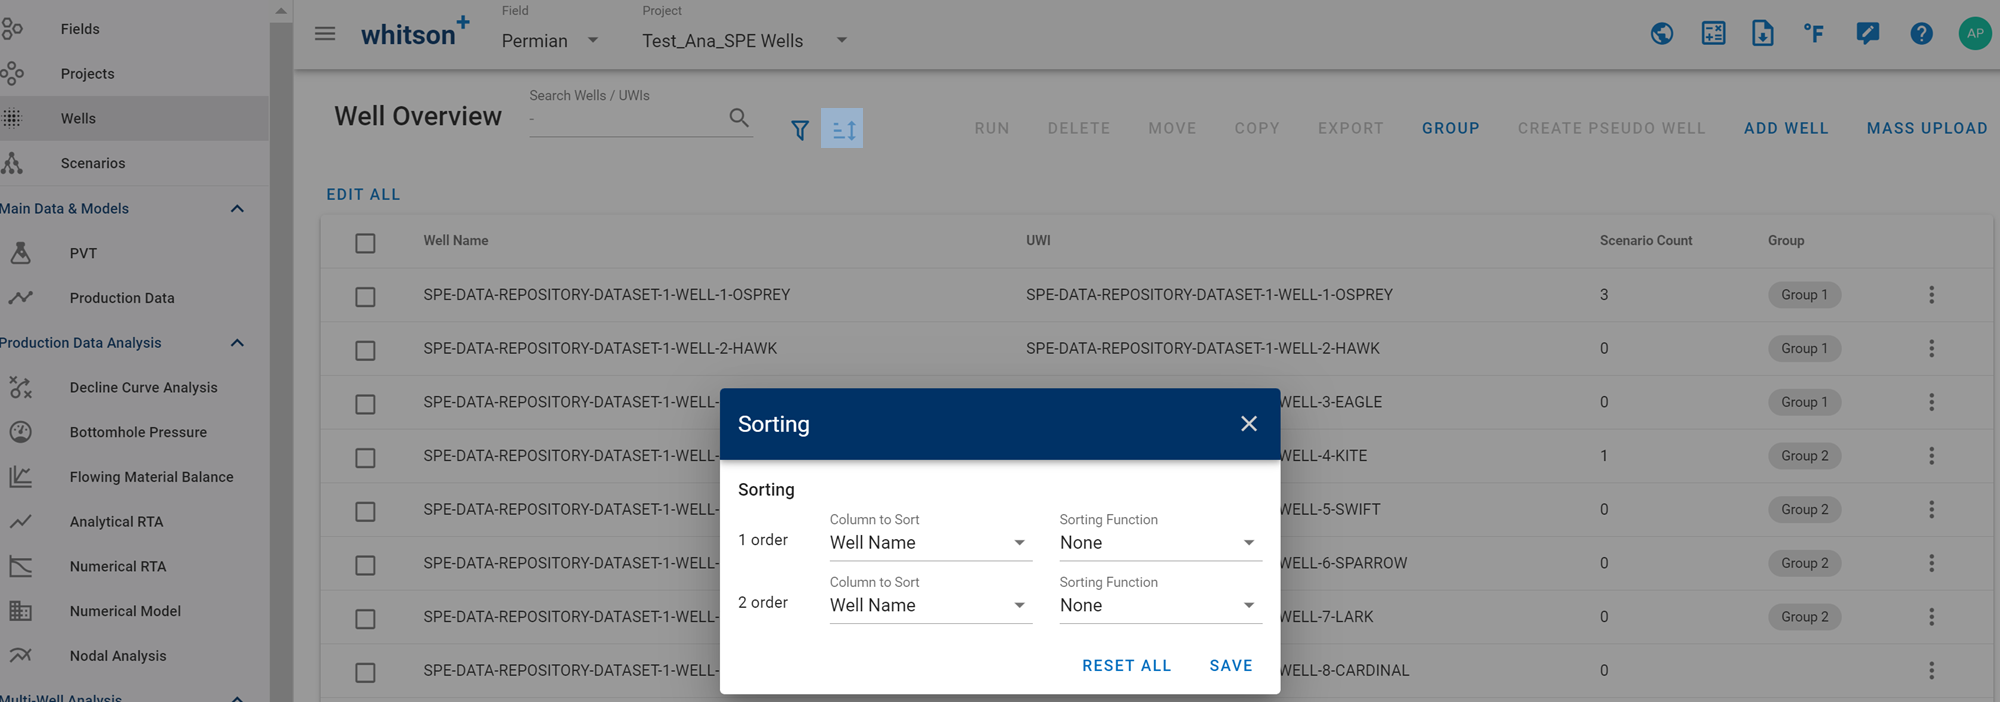
- First-order sorting involves sorting wells based on a single column or criterion.
- Second-order sorting involves sorting wells based on two or more columns simultaneously.
The software first sorts the wells based on the primary sorting column. This establishes the overall order for most of the data. If there are rows with duplicate values in the primary column, the software then performs a secondary sort on those rows only.
Warning
RESET ALL to remove all sorting criteria.
3. Run
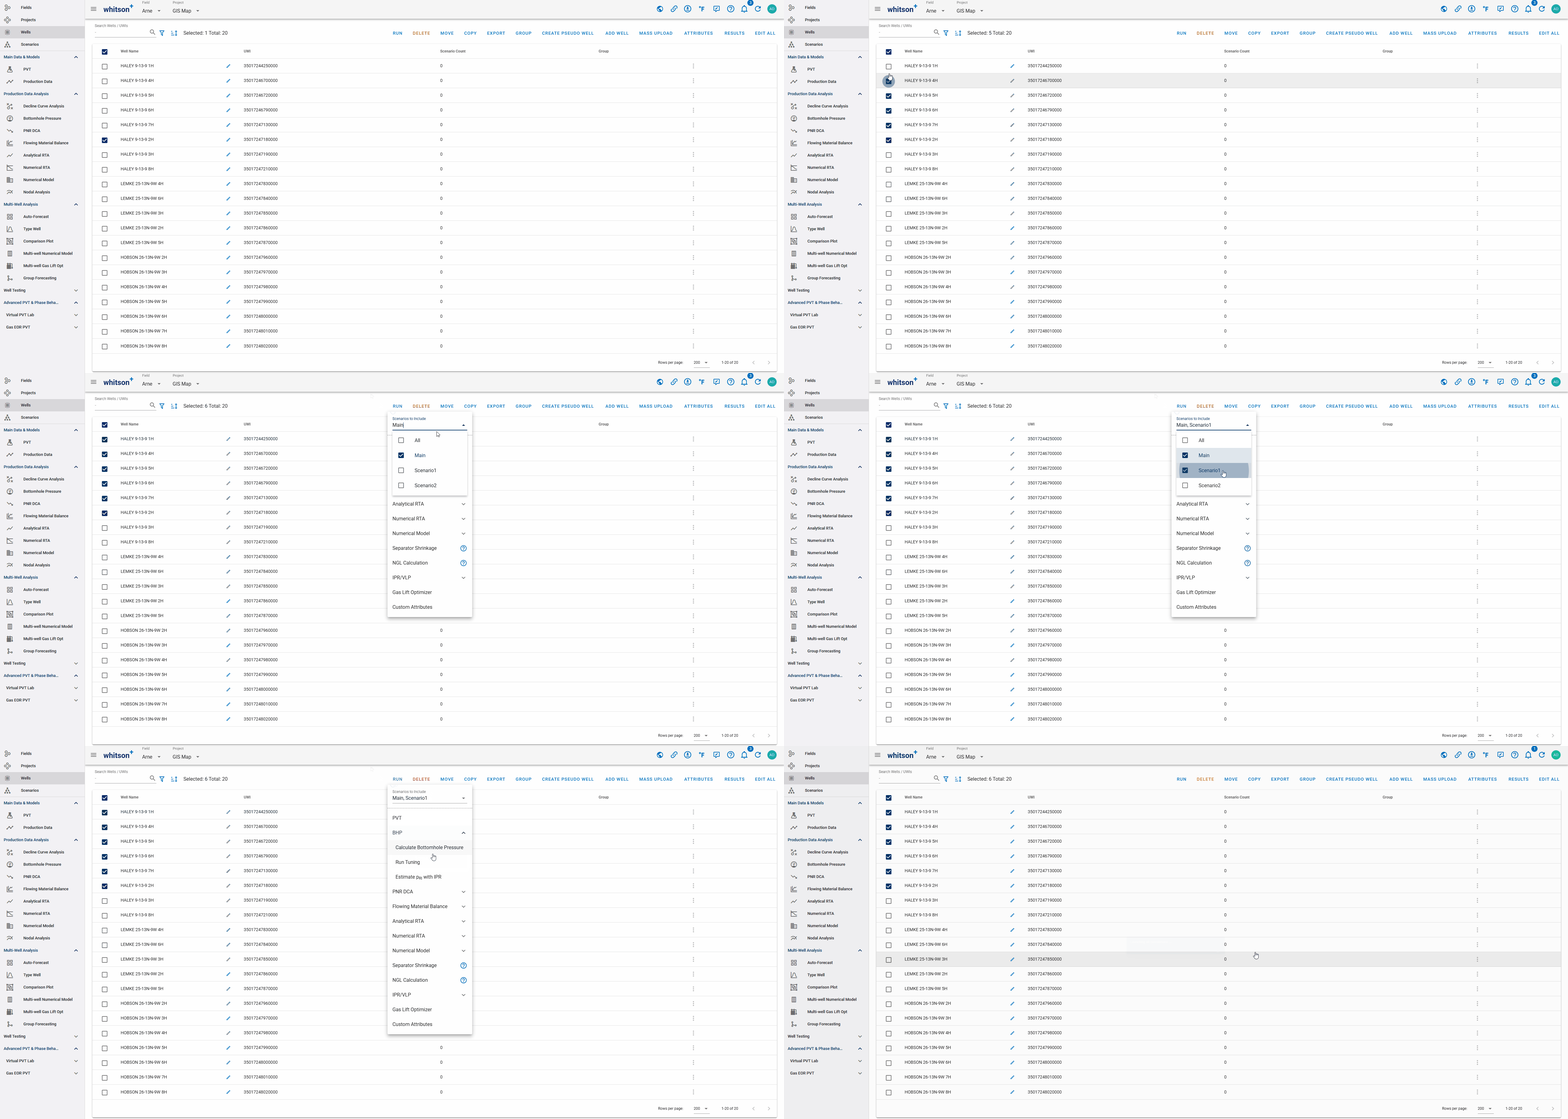
For a bulk run of a process, select the wells and click “Run”. This will display all processes available for bulk execution. You can then choose which scenarios to include, such as Main, Scenario 1, or Scenario 2, either individually or in any combination.
4. Delete

Select the wells you want to delete from the project. Click "Delete" to confirm permanent removal.
5. Move
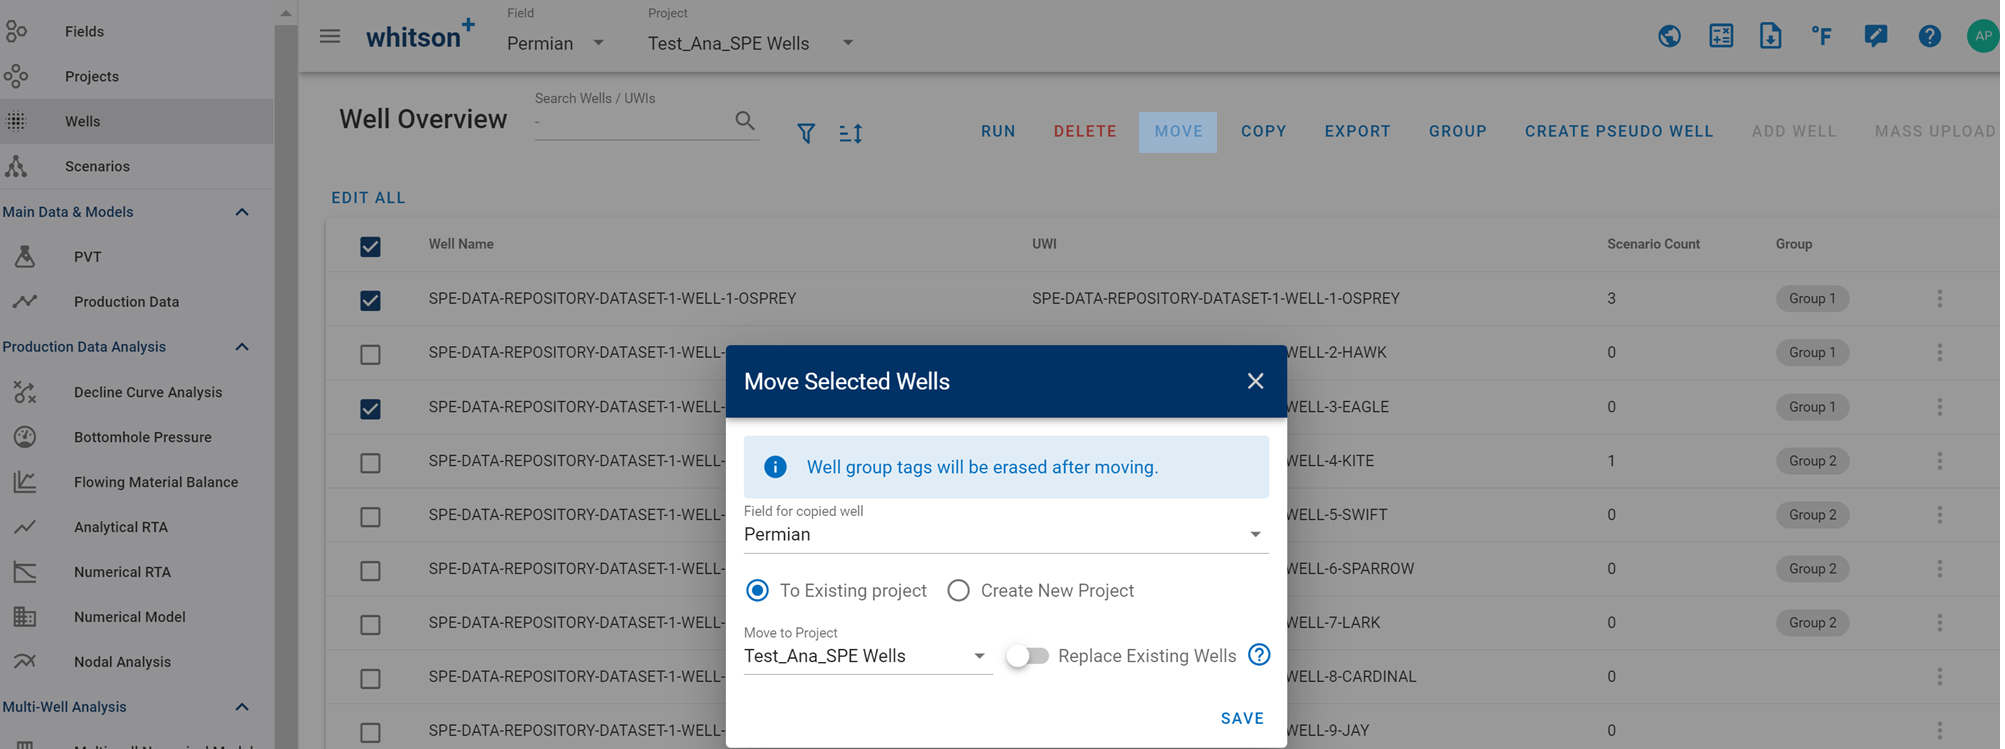
Select the well(s) you want to move from the project. Click "Move" and choose a destination field for the moved well(s). You can either move them to an existing project (in this case, select the name of the project from the display list) or create a new project.
Warning
Remember moving a well will remove the well from the source project!
When the "Replace Existing Wells" toggle is on, wells with the same name in the destination project will be replaced by the wells from the source project. When the toggle is off, wells with the same name will be skipped (not moved).
6. Copy
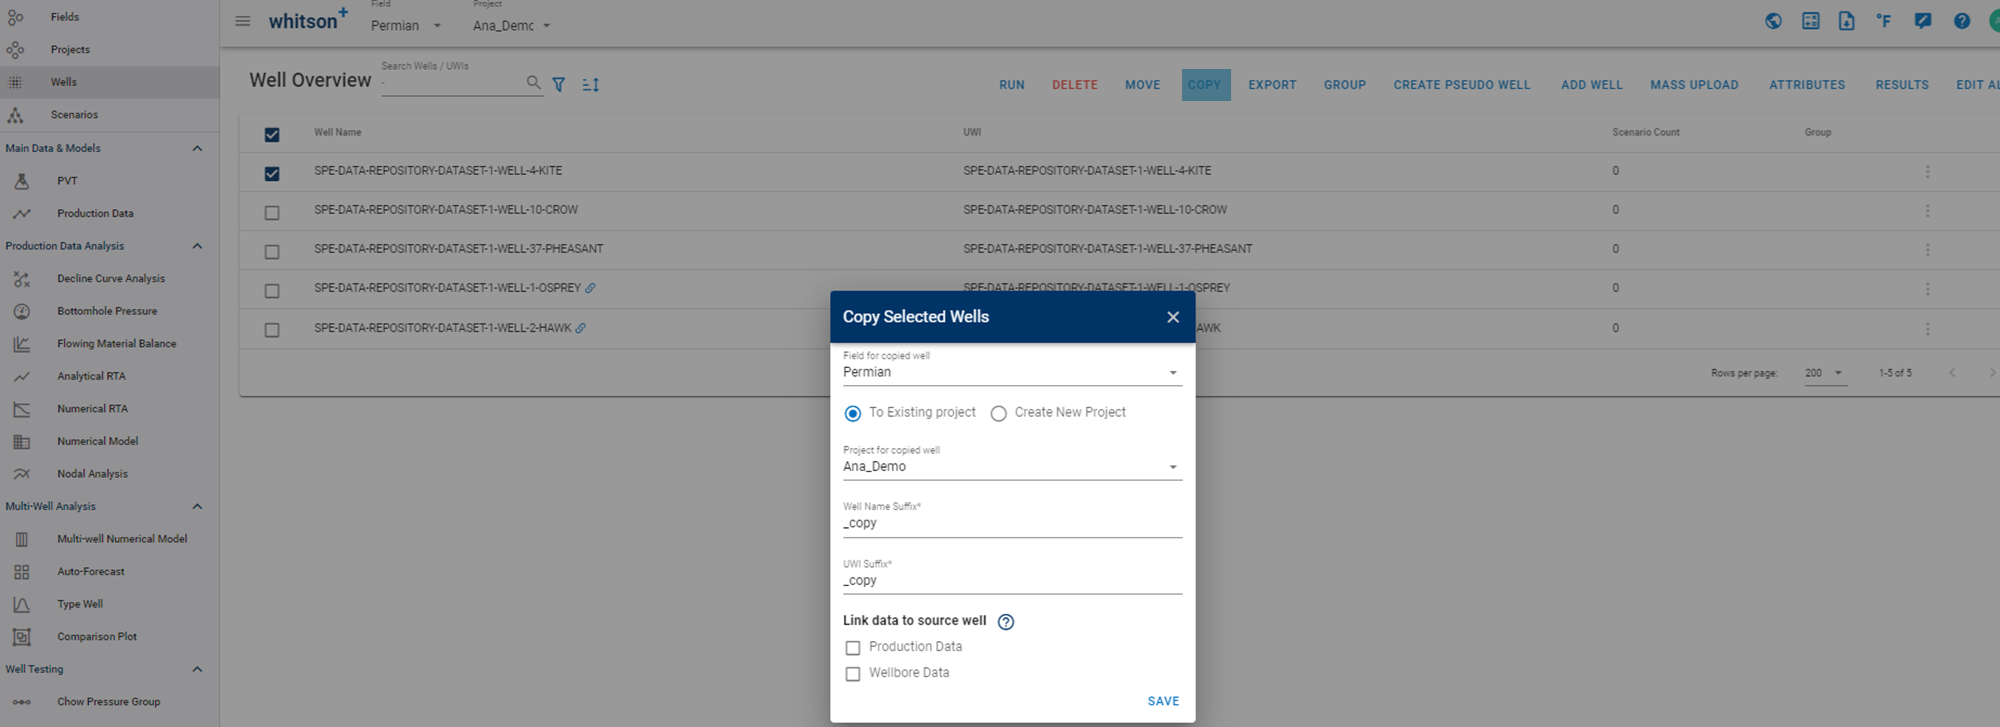
Select the well(s) you want to copy from the project. Click "Copy" and choose a destination field for the copied well(s). You can either copy them to an existing project (in this case, select the name of the project from the display list) or create a new project. Add a suffix to the well name and UWI, this suffix will be append to each copied well.
When a well is copied, only the "Main" scenario will be copied.
6.1. Copy Well with Data Link
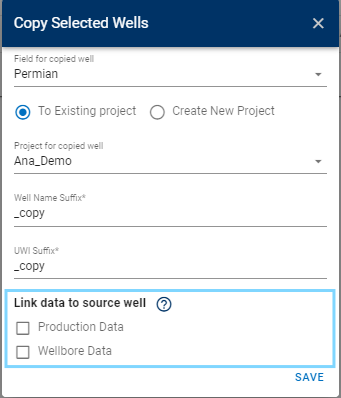
Option to link data (production data and/or wellbore data) to the source well.
- Checked: the data will be linked to the source well, the linked data is identical to the source well and can only be edited in the source well, not in the linked entity. This action avoids having update of the data in two places.
- Uncheck: the data will be copied, not linked to the source well, allowing for independent editing of the copied data.
To see what each check box does, click here
6.2. How to copy a well and a specific scenario
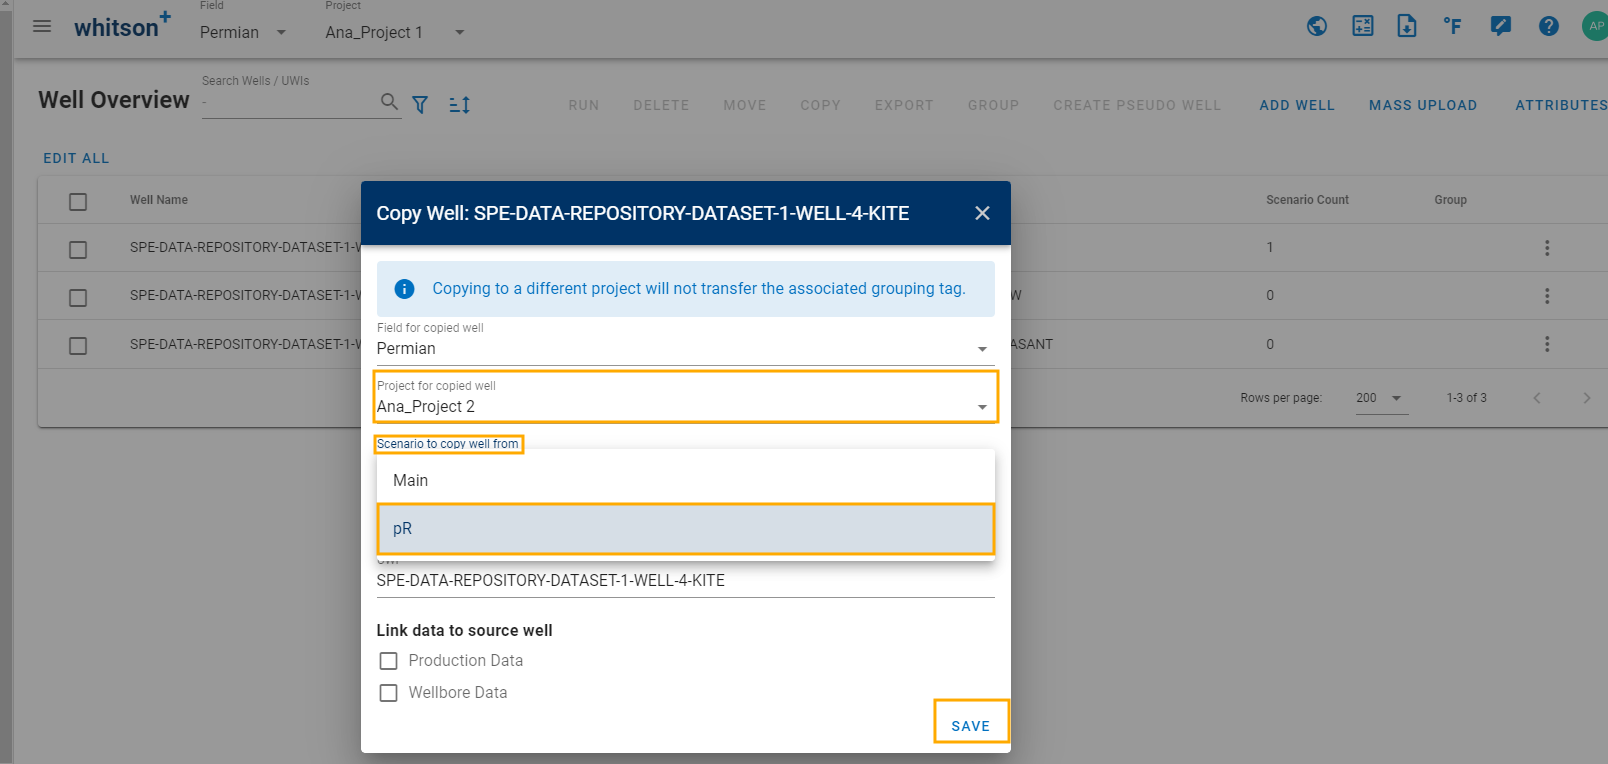
There is an option for copying a well and selecting a different scenario from the main one.
-
Click three dots next to well you'd like to copy a scenario from. Click 'Copy well'.

-
Pick the scenario you'd like to copy to another project and the project name, then Save.
-
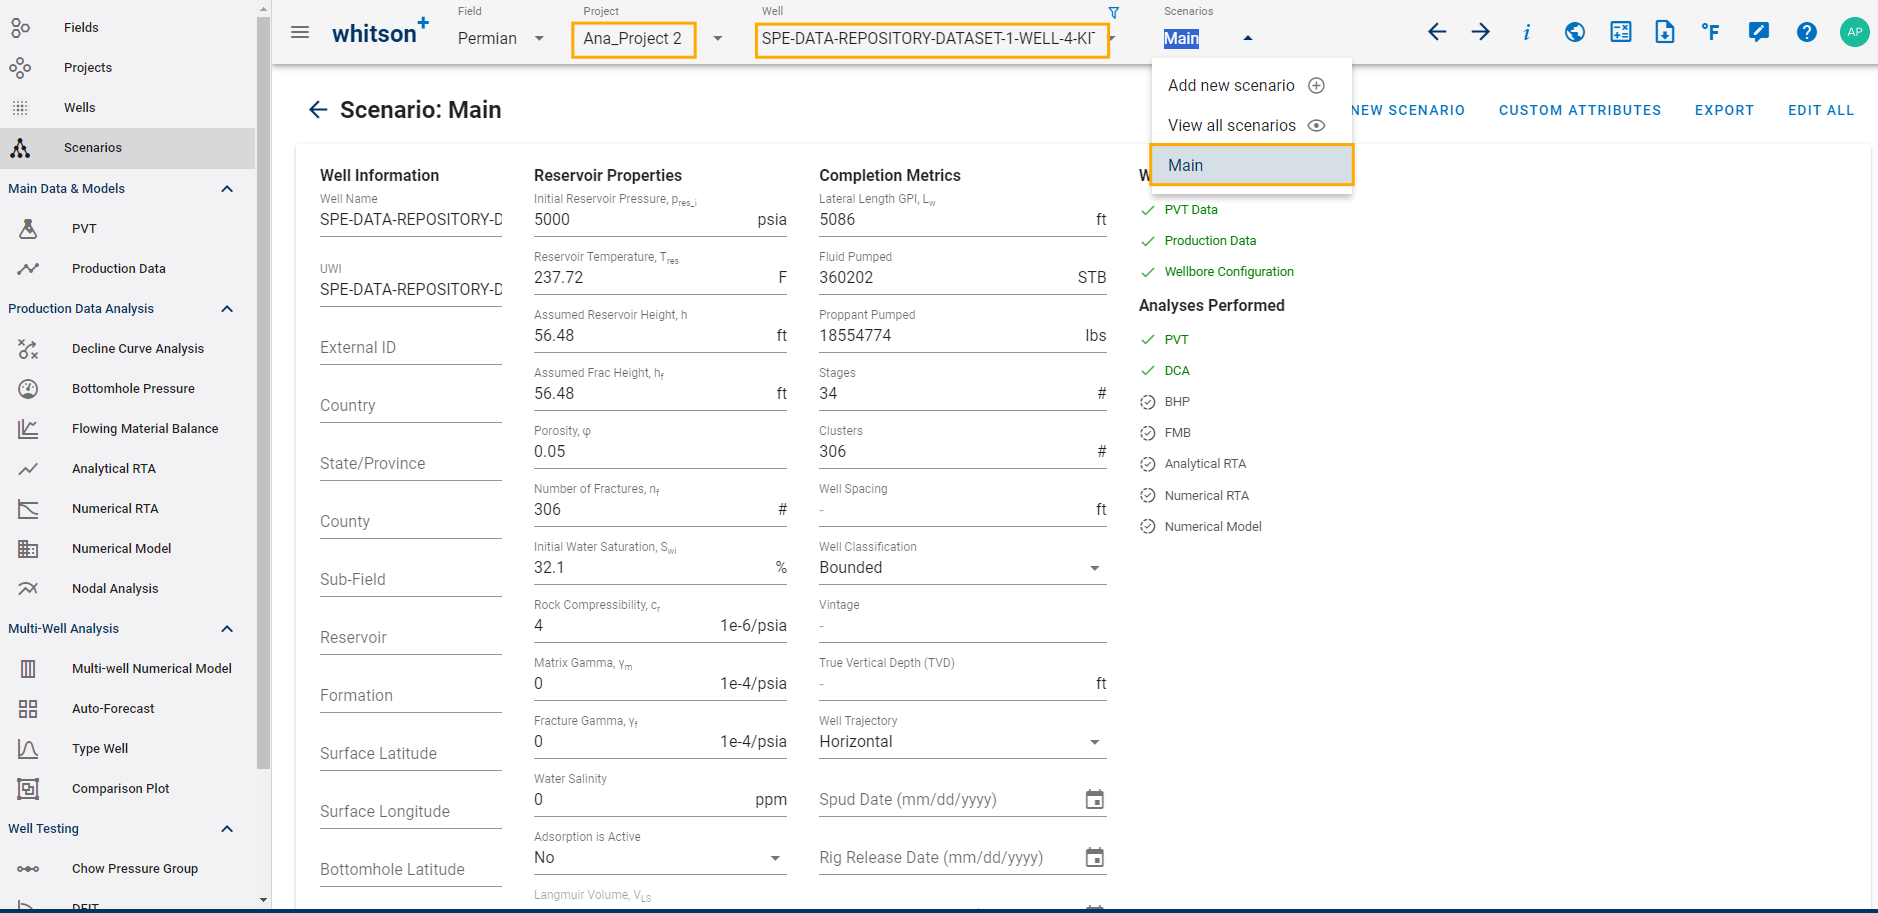
In the other project, you'll find the well with the copied scenario named as "Main".

6.3. Projects, wells and scenarios in a company level workflow
In many platforms there is a hard separation between a company level data store and user level projects. In whitson+ everything lives inside projects, so the typical pattern is:
- Use one or a few shared projects as your "source of truth" for well data for a basin, asset or business unit.
- Load and maintain wells and their production, headers and completions in these shared projects.
- Let individual engineers build their own analyses by creating additional scenarios on the same wells or, when needed, by working on copies of wells.
Within a project there are three main ways to create variations:
1. Creating a new scenario on an existing well
- Keeps a single physical well and a single set of production data in the project.
- The new scenario shares production data with the original scenario, but has its own copy of analysis inputs and model parameters (PVT selection, reservoir properties, completion inputs, RTA settings, numerical model setup, etc.).
- Changes to production data and core well header information in the project are reflected in all scenarios for that well, so each scenario stays tied to the same underlying data.
- This is the recommended way to let different users test sensitivities or alternative models on the same well without breaking each other’s work.
2. Making a copy of a well
- Creates a new well object in the project that starts as a copy of the original, including its scenarios at the time of copying.
- After the copy is created it is independent. Edits to headers, production data or scenarios on the copy do not affect the original well, and vice versa, unless you explicitly link them using Link Well.
- This is useful when you want a completely separate version of a well, for example to:
- Work with a different data set or preprocessing workflow.
- Test a hypothetical development case that should not be tied to the "official" well.
- Freeze a snapshot of a well at a point in time.
3. Using Link / De-link to keep copies tied to a master well
- When copying a well you can link the copied well back to the original using Link Well:
- If you link Production Data, the original well becomes the only place where production can be edited. Updates to production on the original automatically update the linked copy. The copied well’s production table is read only while the link is active.
- If you link Wellbore Data, the link is bidirectional. Edits to wellbore data in either the original or the copied well are reflected in the other.
- This allows you to maintain a clean master well that controls production and, optionally, a shared wellbore description, while still giving users freedom to run independent scenarios and analyses on linked copies.
7. Link Wells
The Link / De-link Well Data functionality allows you to manually create or remove a live data connection between wells across different projects or fields. This is commonly used to keep a copied well synchronized with its original well.
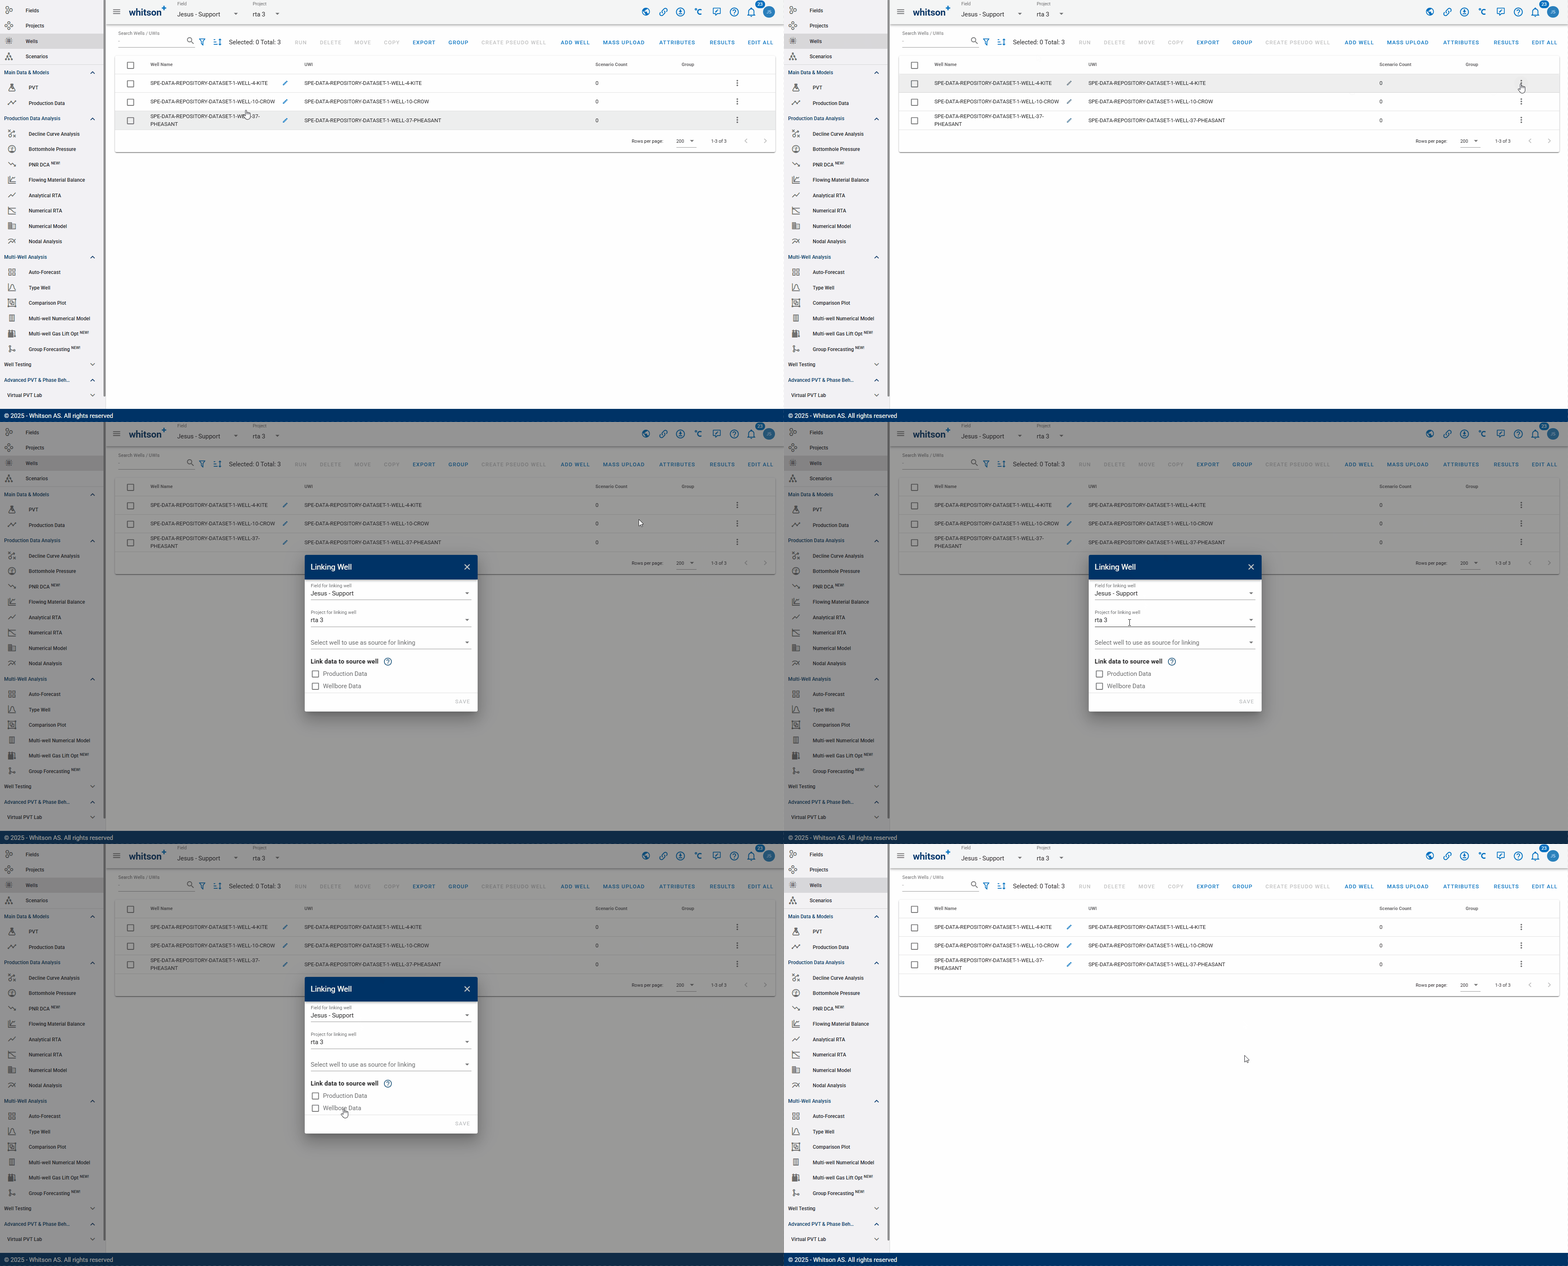
Use the Link Well button to connect or disconnect an existing well to another well's data source. If you'd like to de-link the well, simply uncheck the boxes.
-
Click the Link Well button as shown above.
-
Choose the Project, Field, and Well you would like to link to.
-
Specify whether you want to link:
-
Production Data
-
Wellbore Data
-
Production Data Comments
-
-
Save
When linking an original well to a copied well:
-
If you link Production Data, the original well acts as the source. Any changes you make to production data on the original well will automatically update the copied well. The copied well’s production data becomes read only and cannot be edited directly while the link is active. All production edits must be done on the main (source) well.
-
If you link Wellbore Data, the connection is bidirectional. Changes made to wellbore data on either the original or the copied well are synchronized, so edits in one will update the other.
-
If you link Production Comments, the original well acts as the source. Comments can only be added or edited on the original (source) well. The copied well’s comments become read only while the link is active, and any updates made on the original well will automatically appear on the copied well.
8. Group
8.1 Create groups
Select the well(s) and create a group tag based on the desired criteria.

8.2 Removing multiple wells from groups
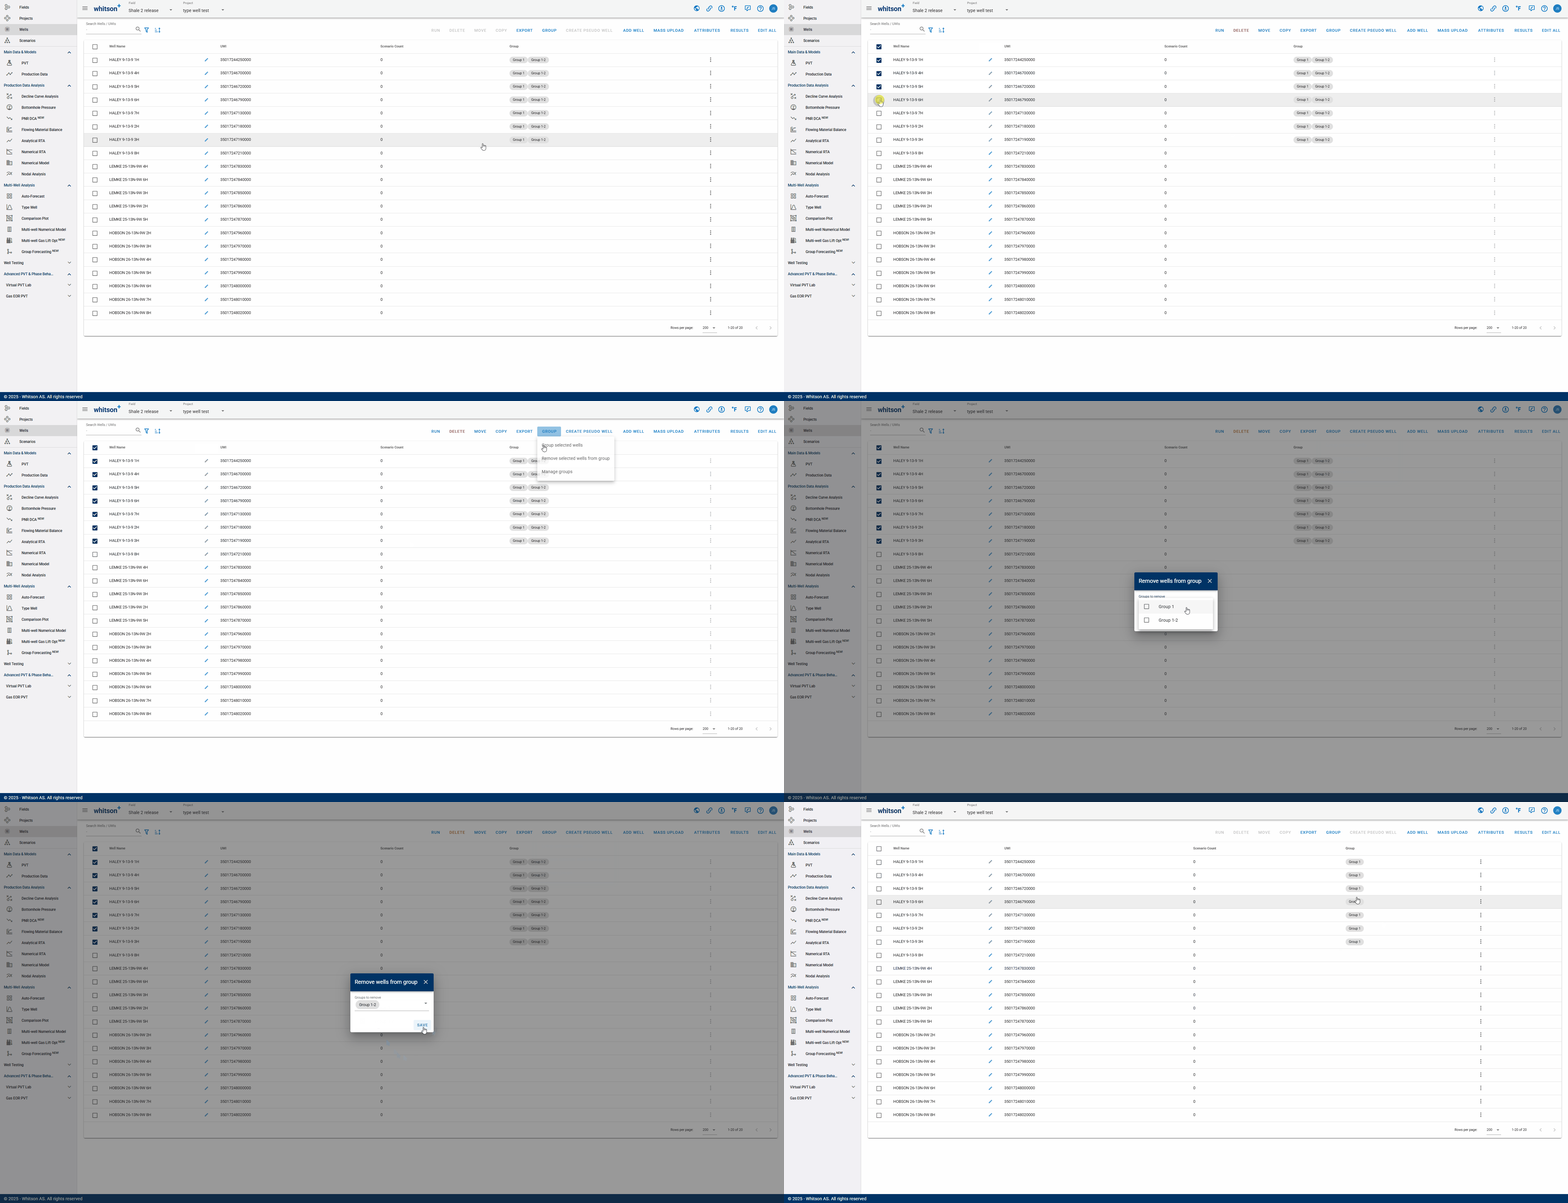
9. Create Pseudo Well

Several wells can be combined into a "pseudo well," as outlined by Thompson et al. (2023), where rates and bottomhole pressures are merged into one composite well.
-
Rates are summed for each stream and each data point.
-
Bottomhole pressures are aggregated based on the proportion of total mass produced by the well, i.e., a mass rate-weighted bottomhole pressure.
Prior to utilizing this functionality, ensure that the individual well PVT and bottomhole pressures are defined. Additionally, verify that the flowing material balance feature has been executed for each individual well.
10. Add Well
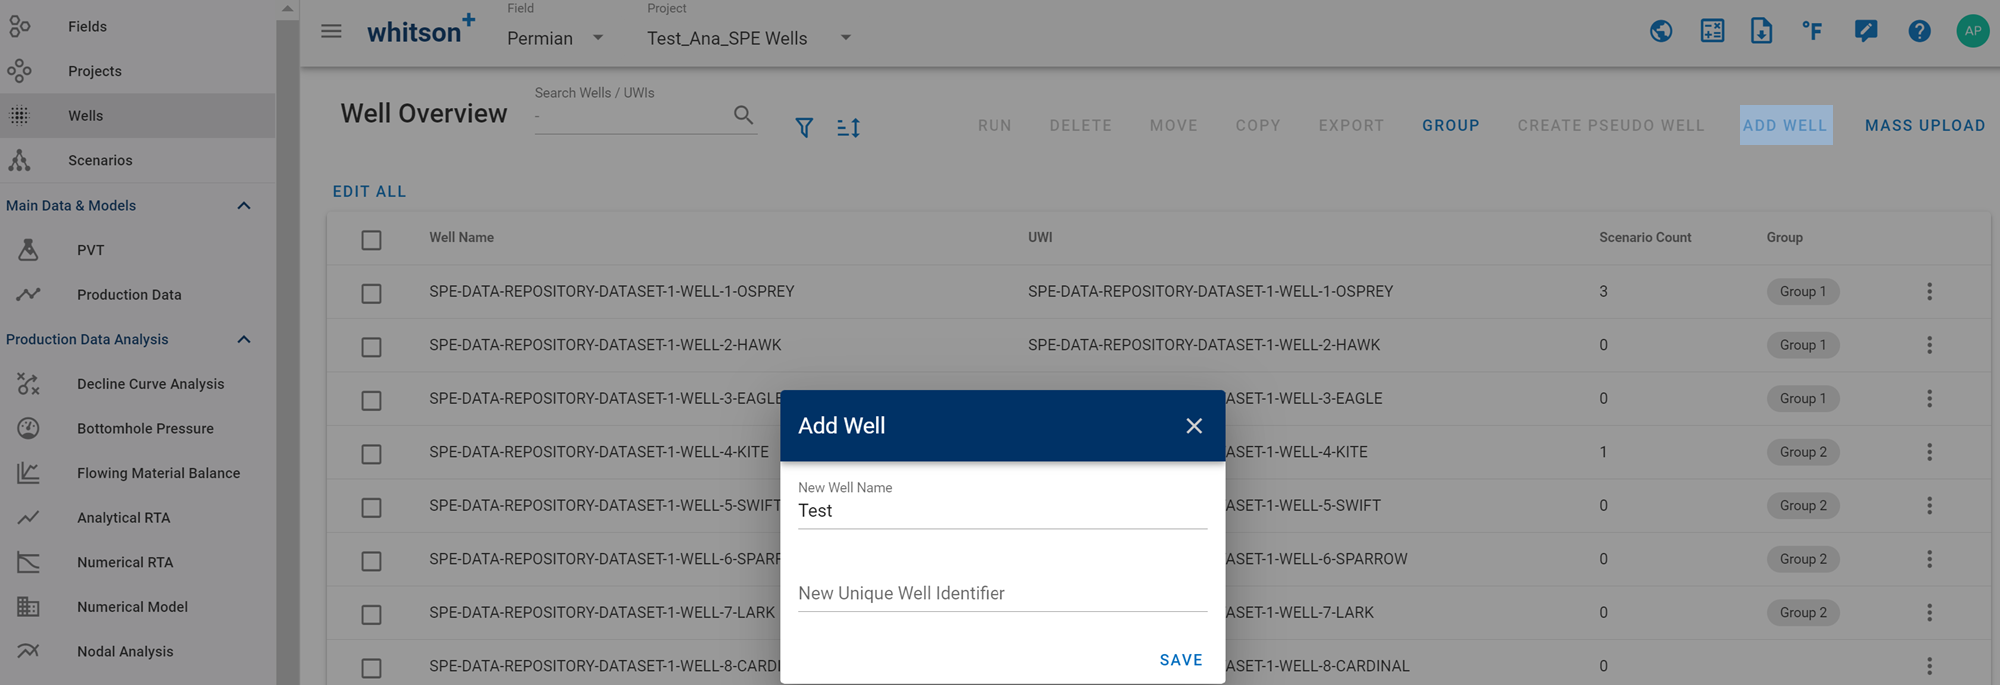
To add a new well, provide the well name and the unique well identifier.
11. Attributes
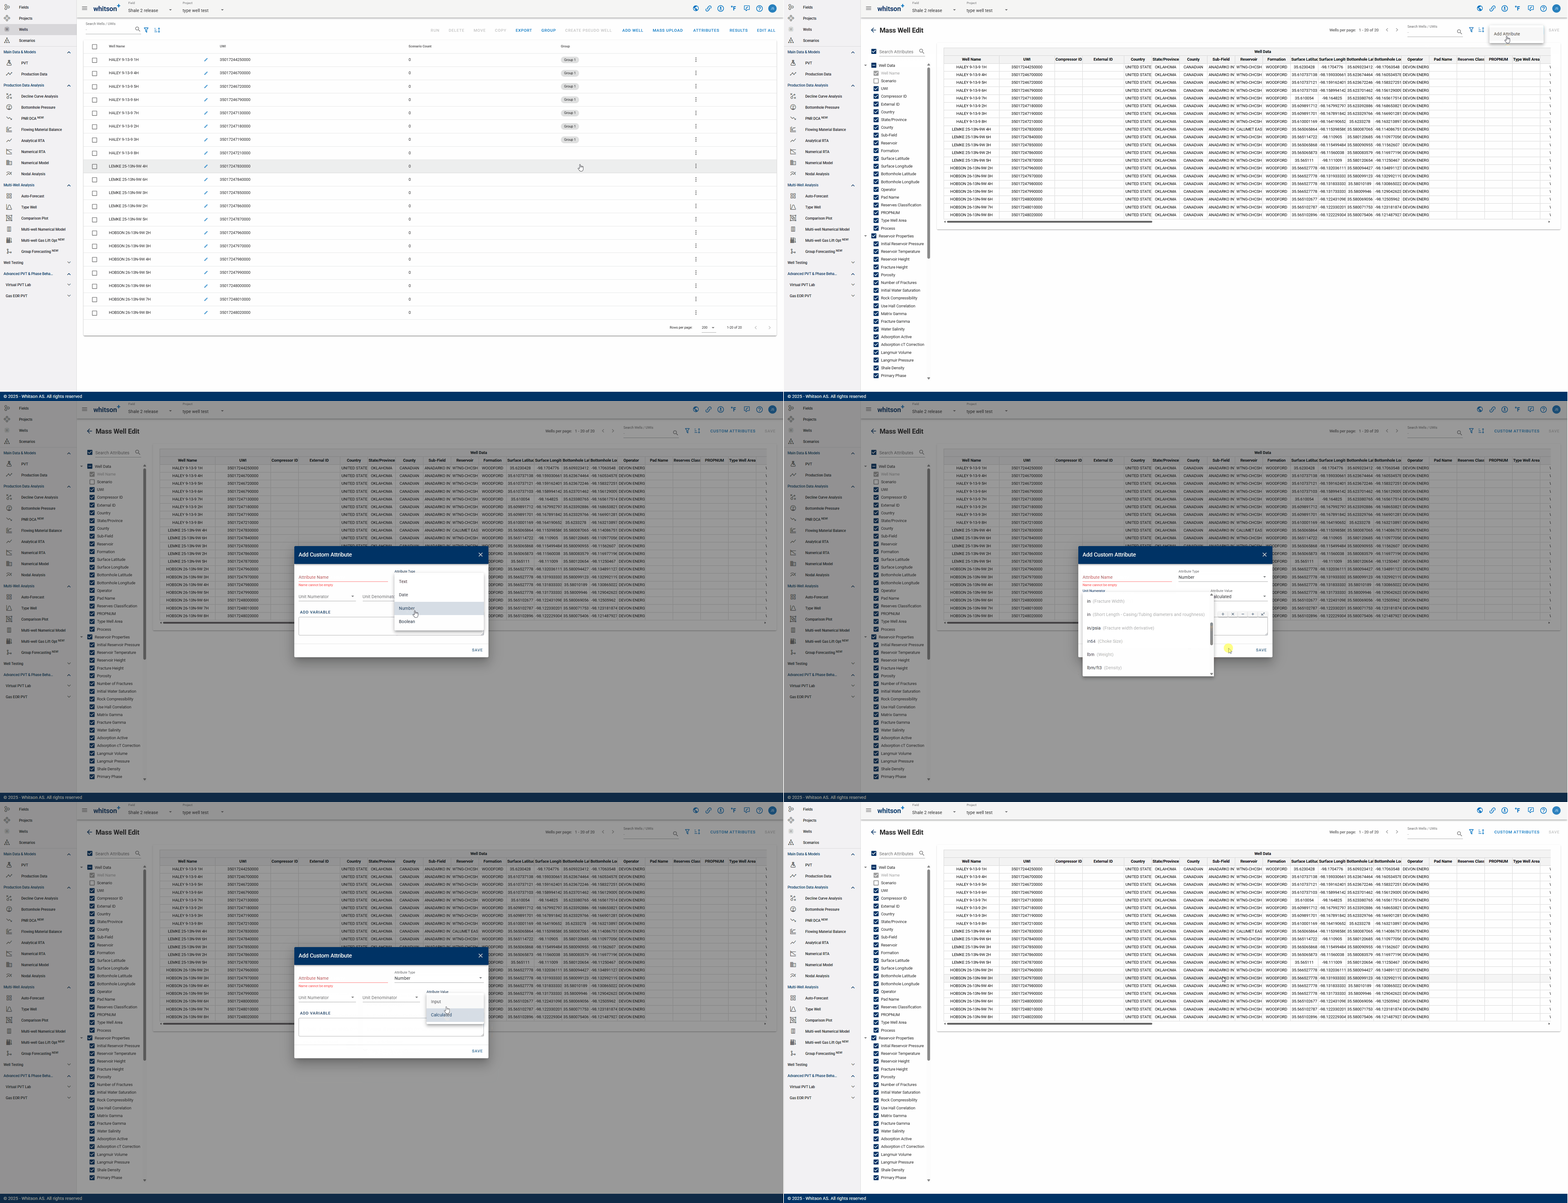
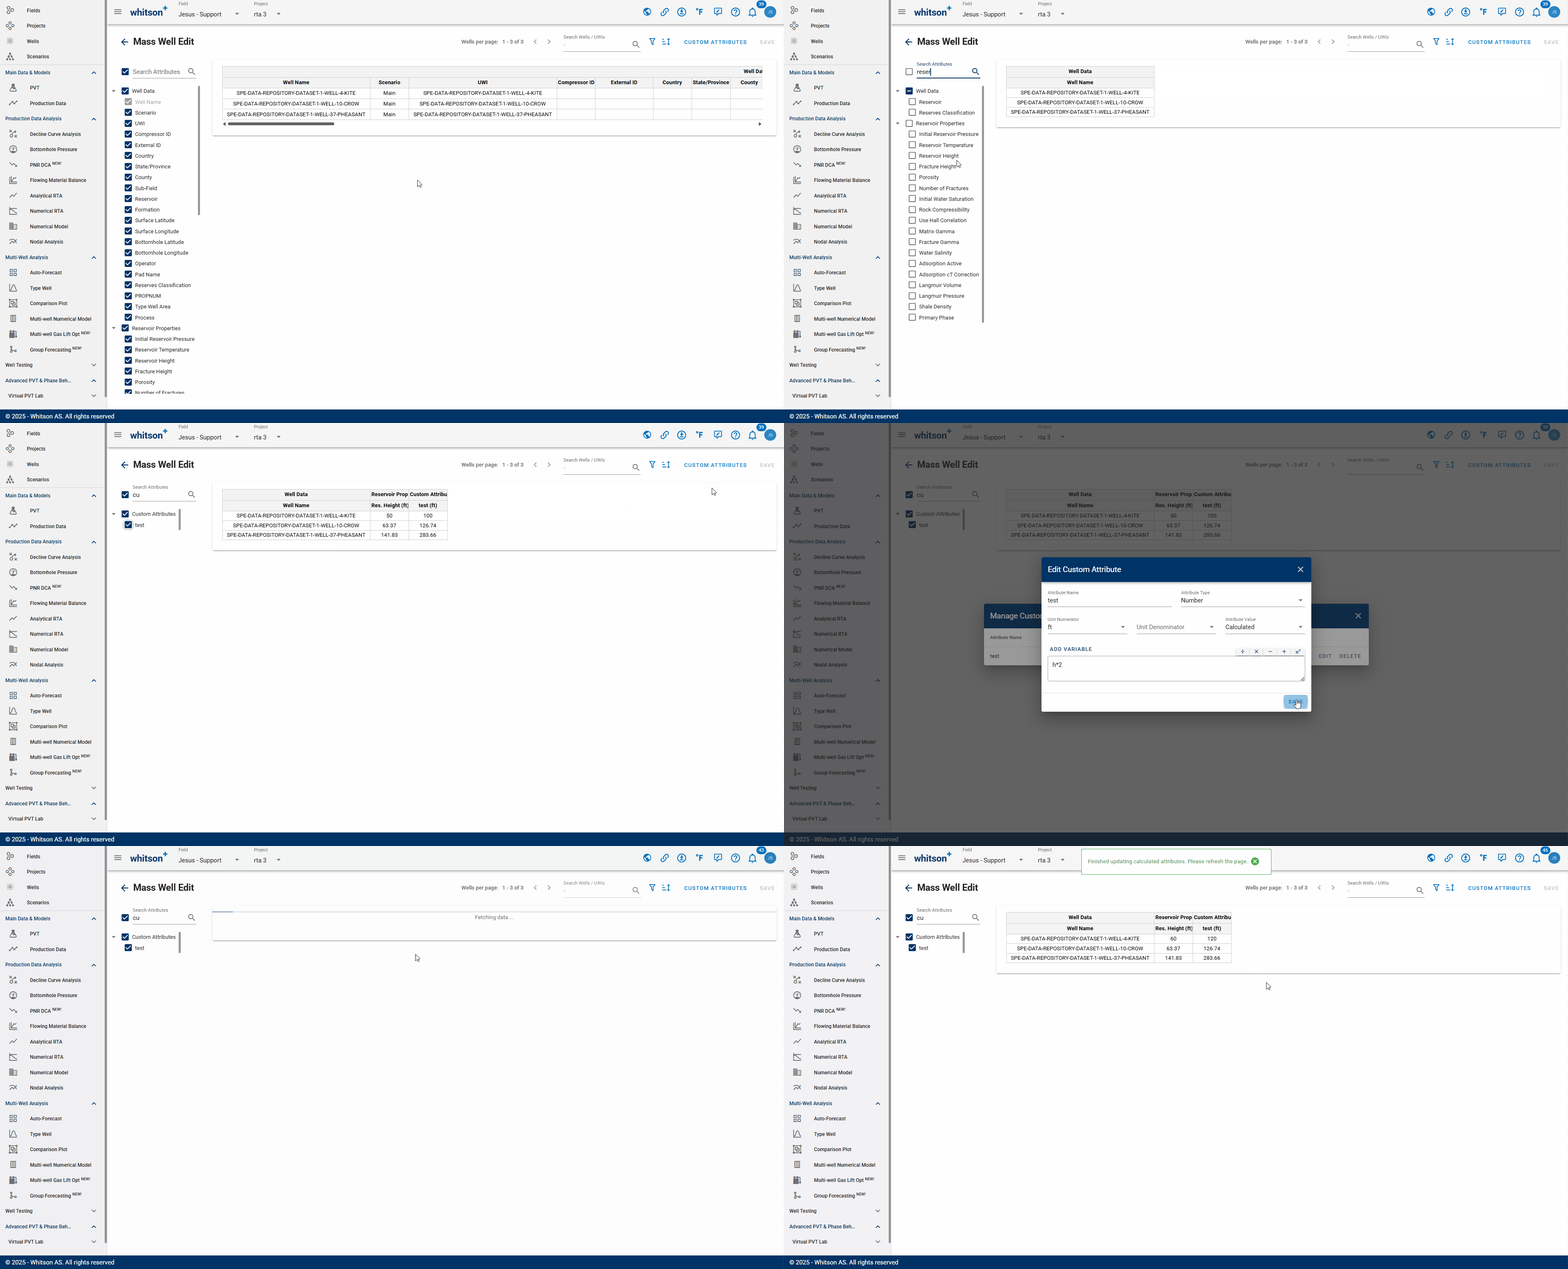
Here, you can add unique attributes by which you would like your wells to be classified. You can choose the attribute type, as well as specify the units and whether the attribute is input or calculated.
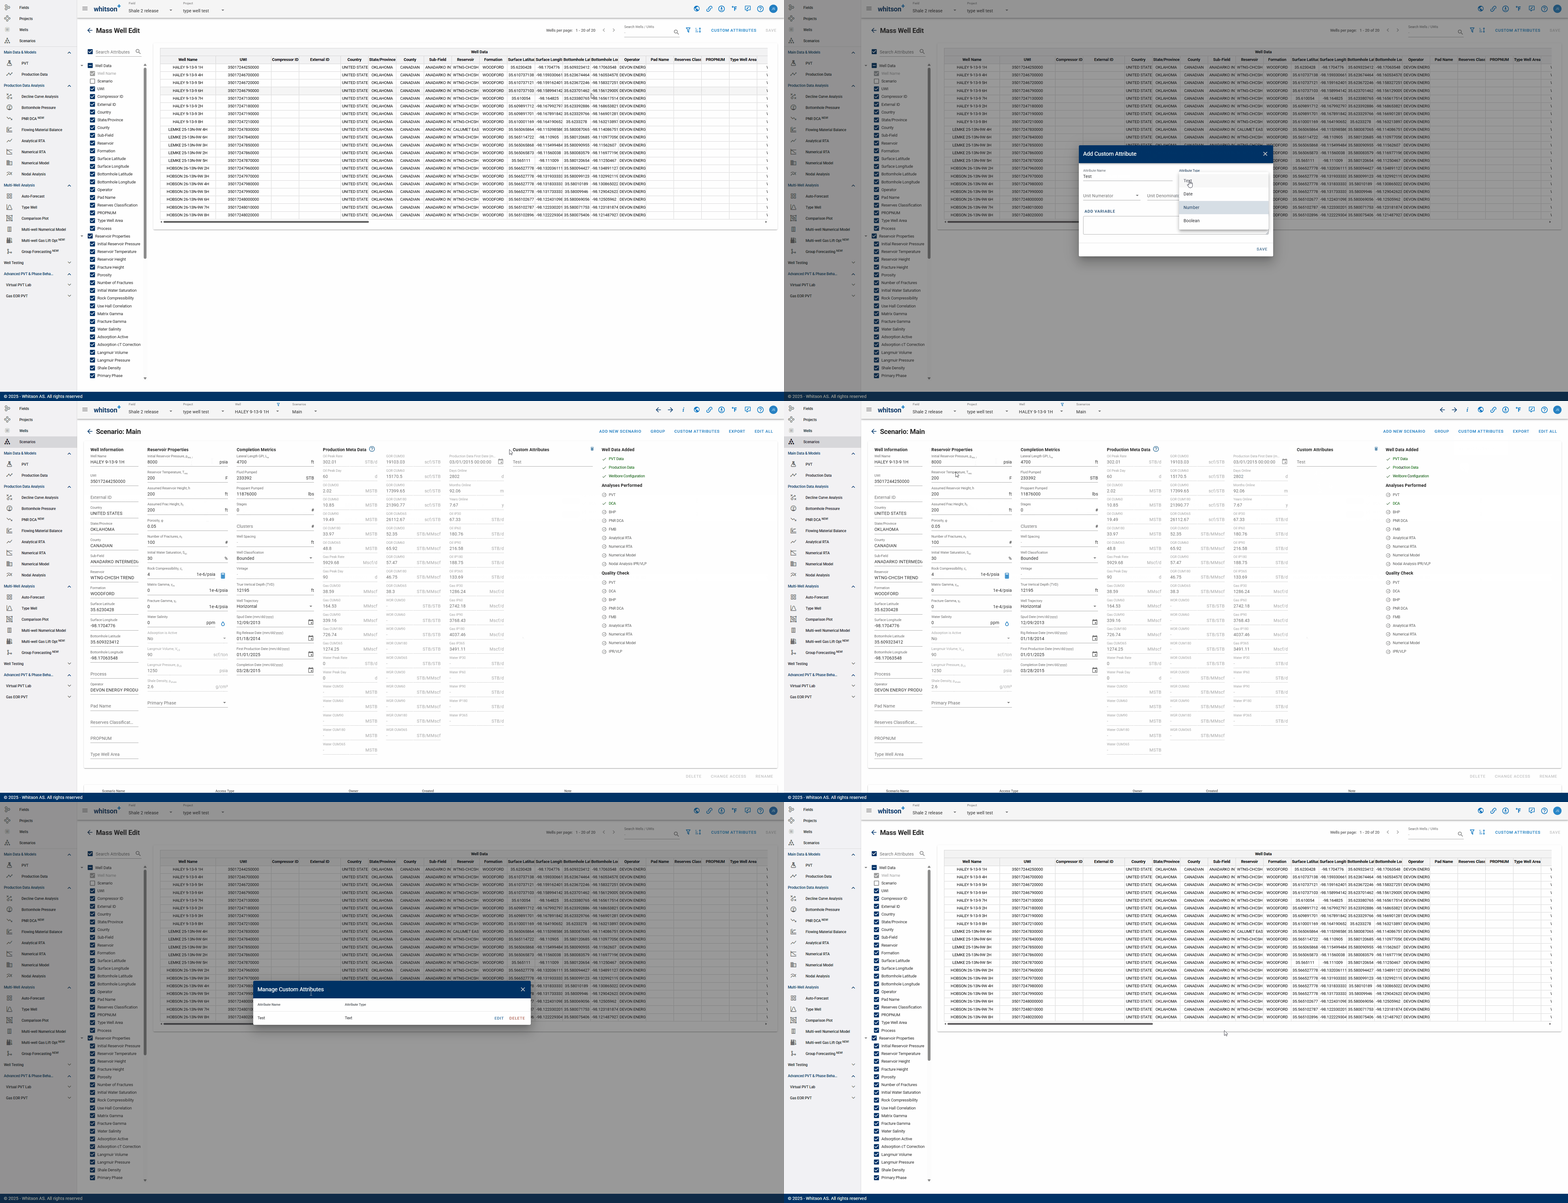
Once an attribute is added, it will appear in the "Scenarios" section when you click on any individual well, as shown above.
11.1 Updating Attribute Table
After changing values in the attribute table, you must always press Save for your changes to be retained. This ensures that the changes remain after you leave the tab and come back.
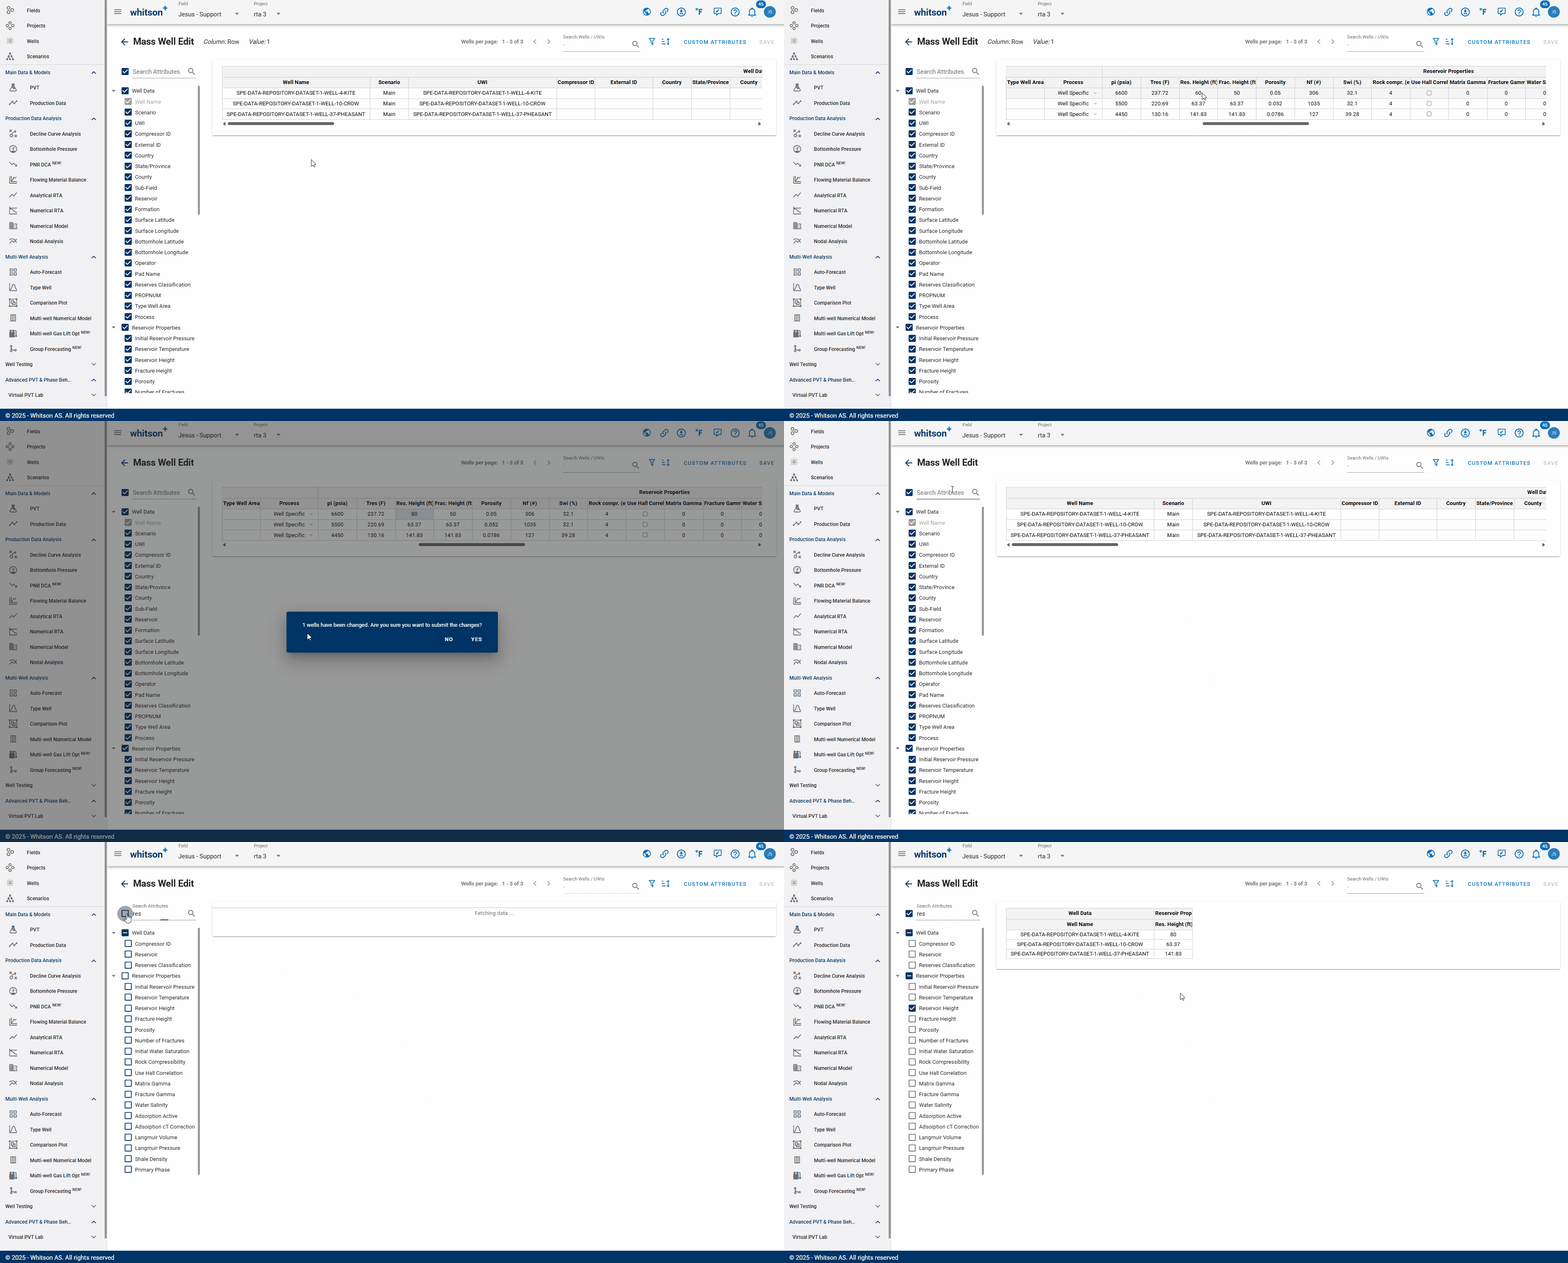
11.2 Calculate Attributes
If you have calculated attributes that depend on other existing attributes, you must click the Calculate Attributes button after modifying any of the input values to ensure the calculated fields are updated.
12. Edit All
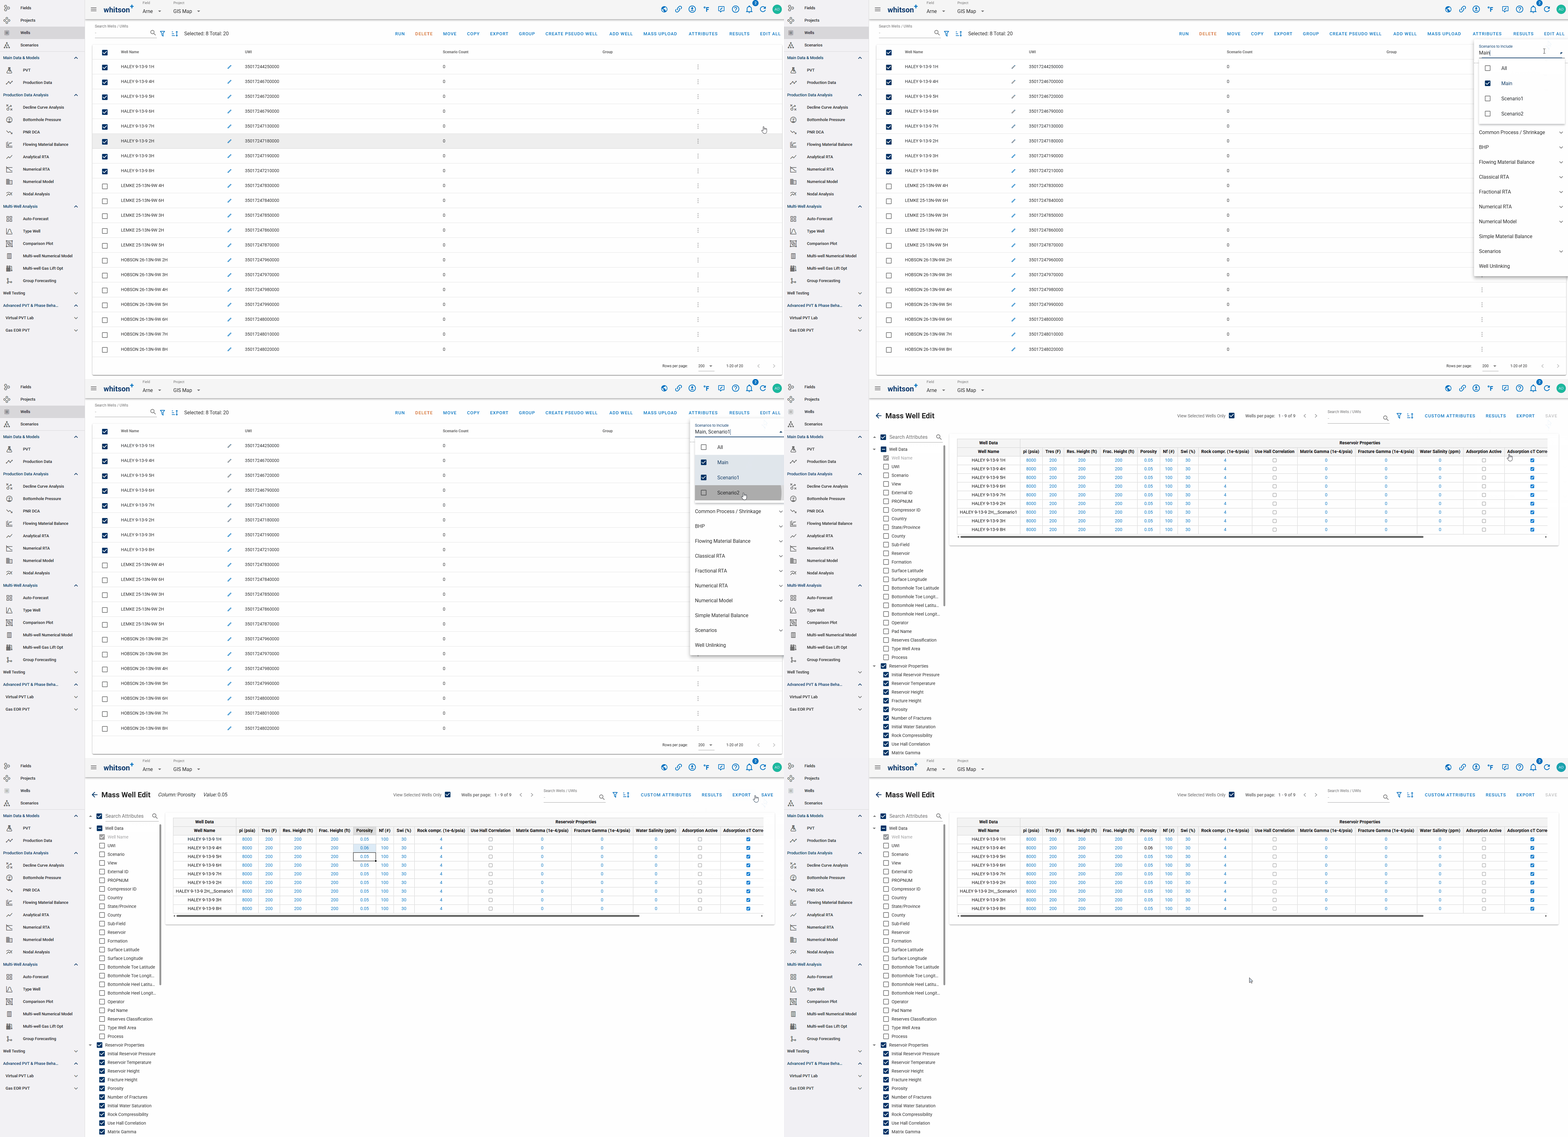
For a bulk edit, select the wells and clicking "Edit All" will then display all the processes and relevant parameters that can be selected for bulk edition in one view. You can also choose which scenarios to include, e.g., Main, Scenario 1, or Scenario 2, either individually or in any combination.
12.1. Well, reservoir & completion
Mass well edit: This table has all the well data, reservoir properties, completion metrics, and custom attributes associated with each well. This information can be edited manually within the table or bulk edited by copying and pasting information from Excel.

12.2. DCA
- Forecast Manager: Managing well data and other relevant information about the well in the form of a table.
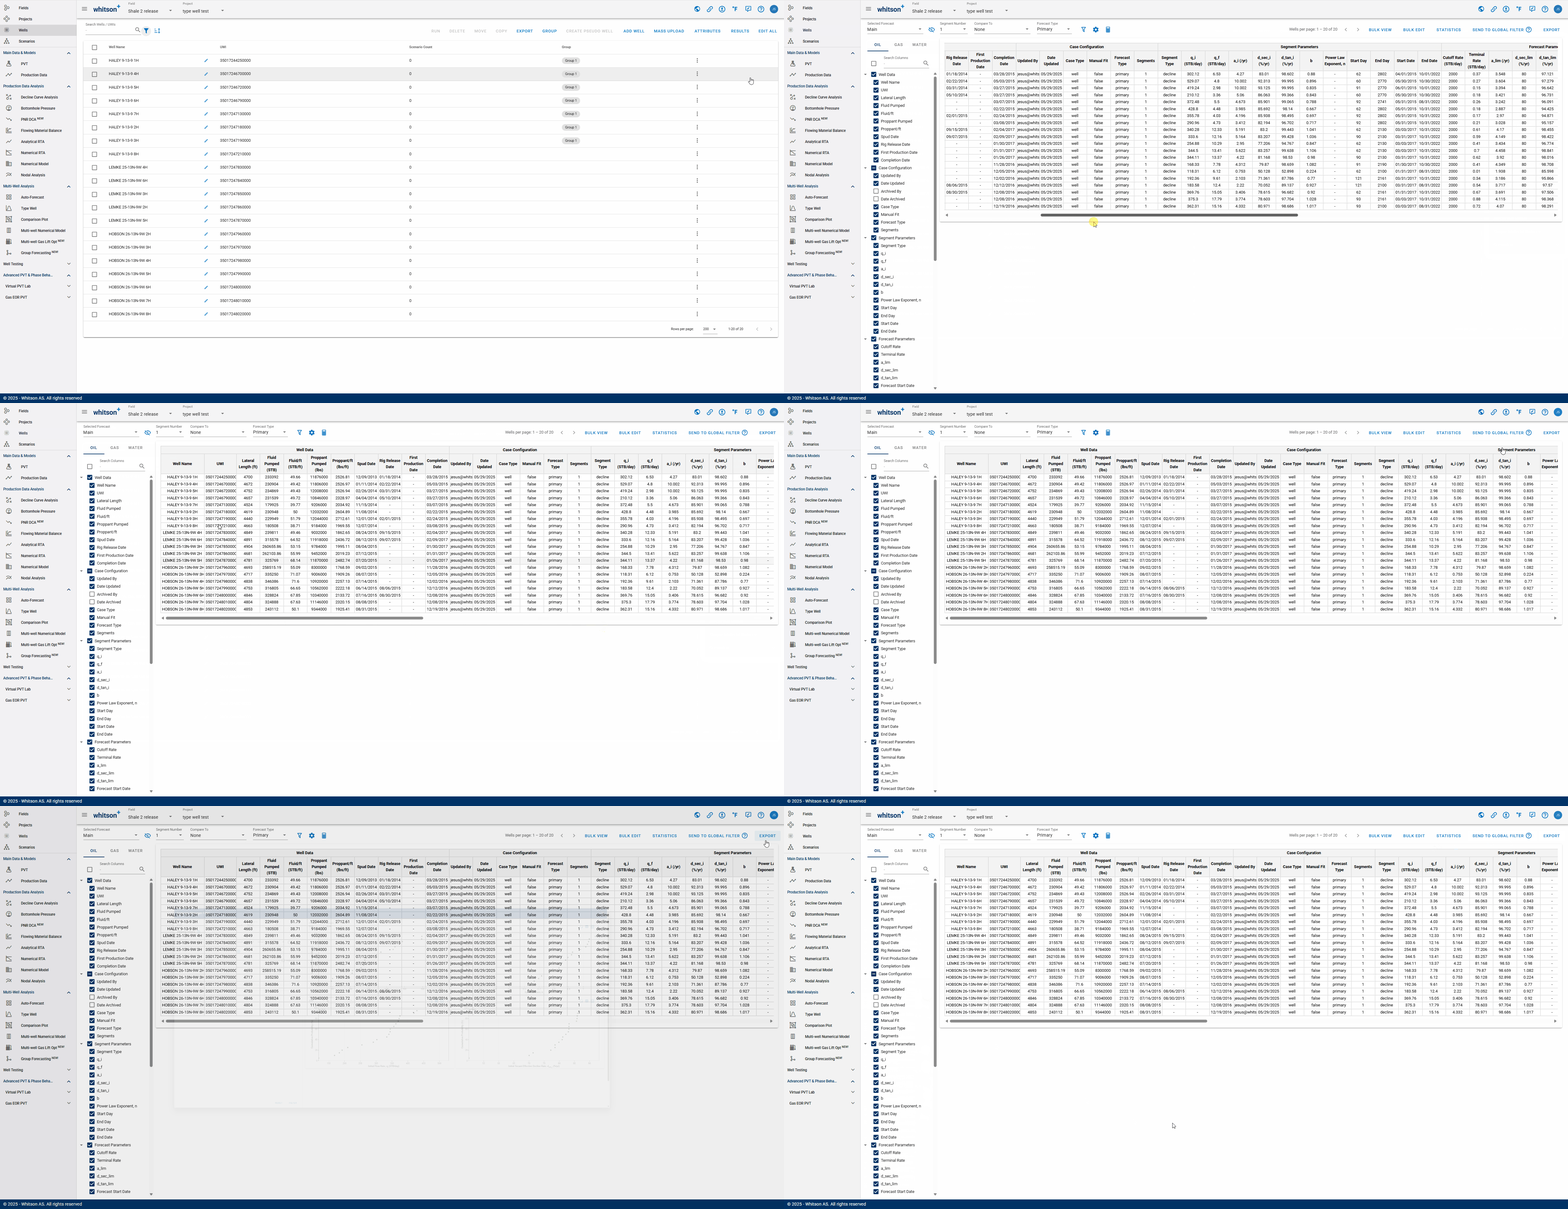
- Terminal Conditions: Option to bulk edit DCA Forecast information for all selected wells.
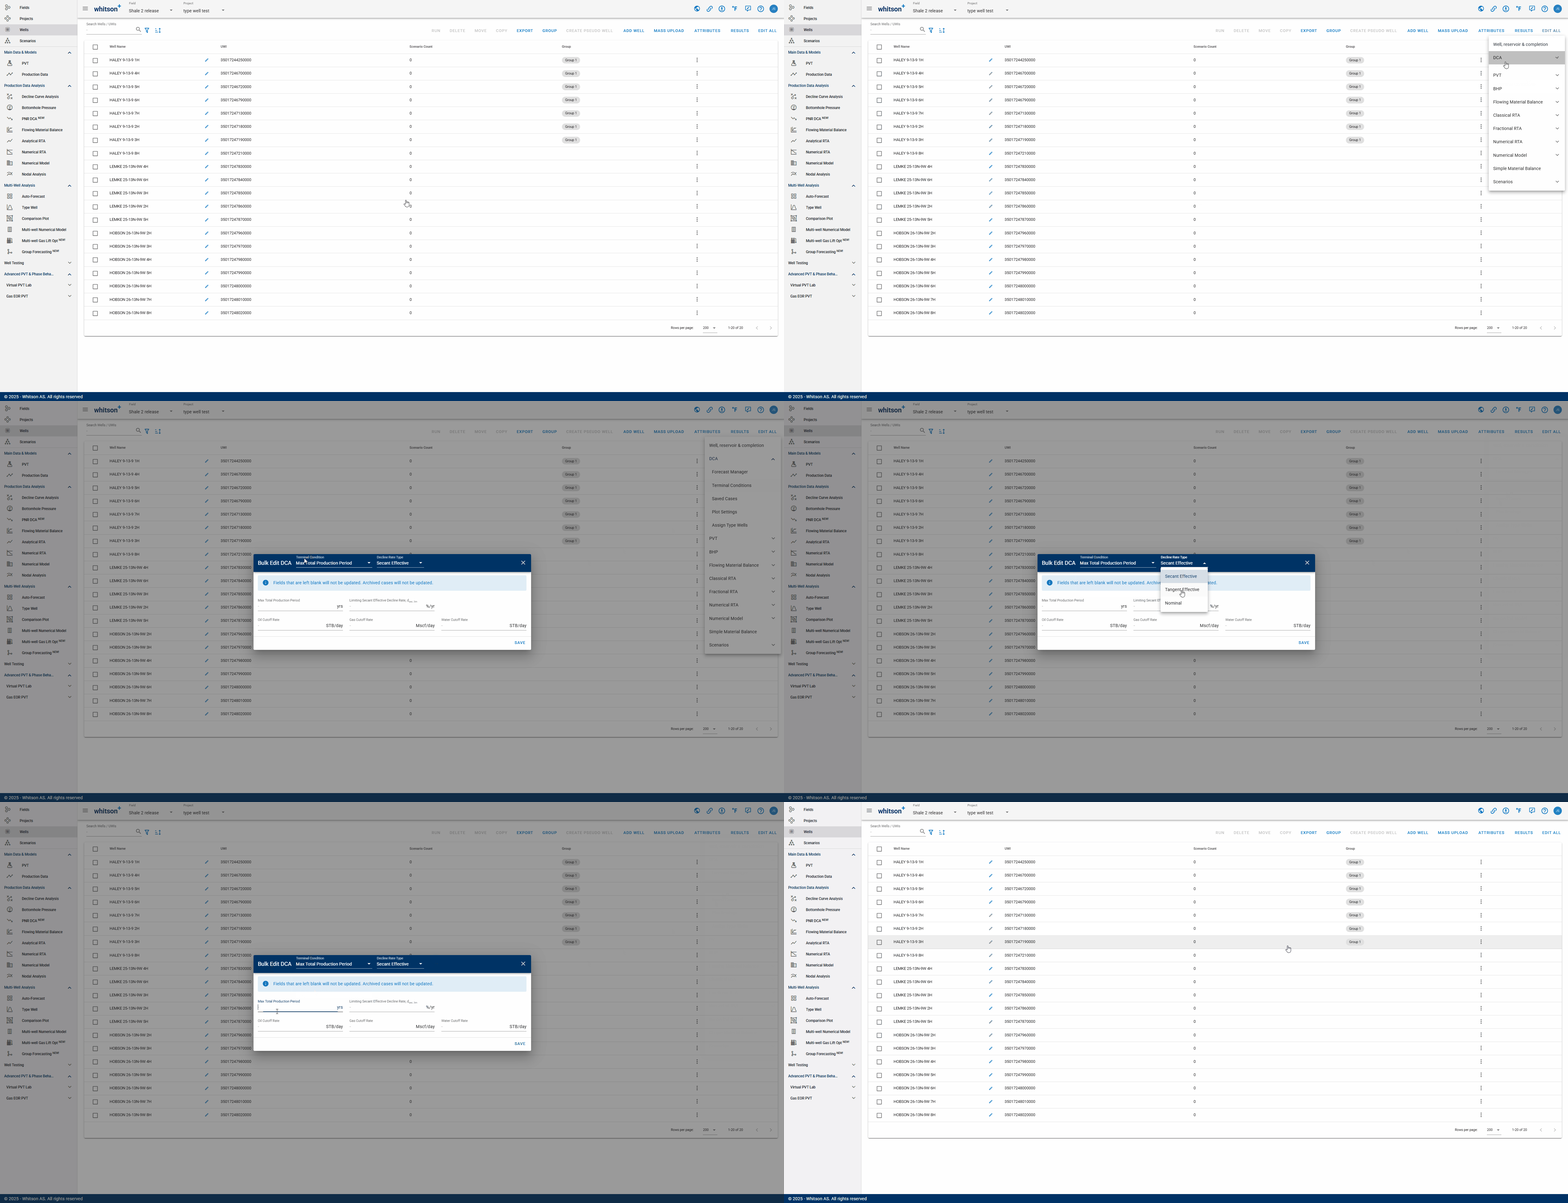
If this information is modified, it will edit the forecast information for the “Decline Curve Analysis” module.
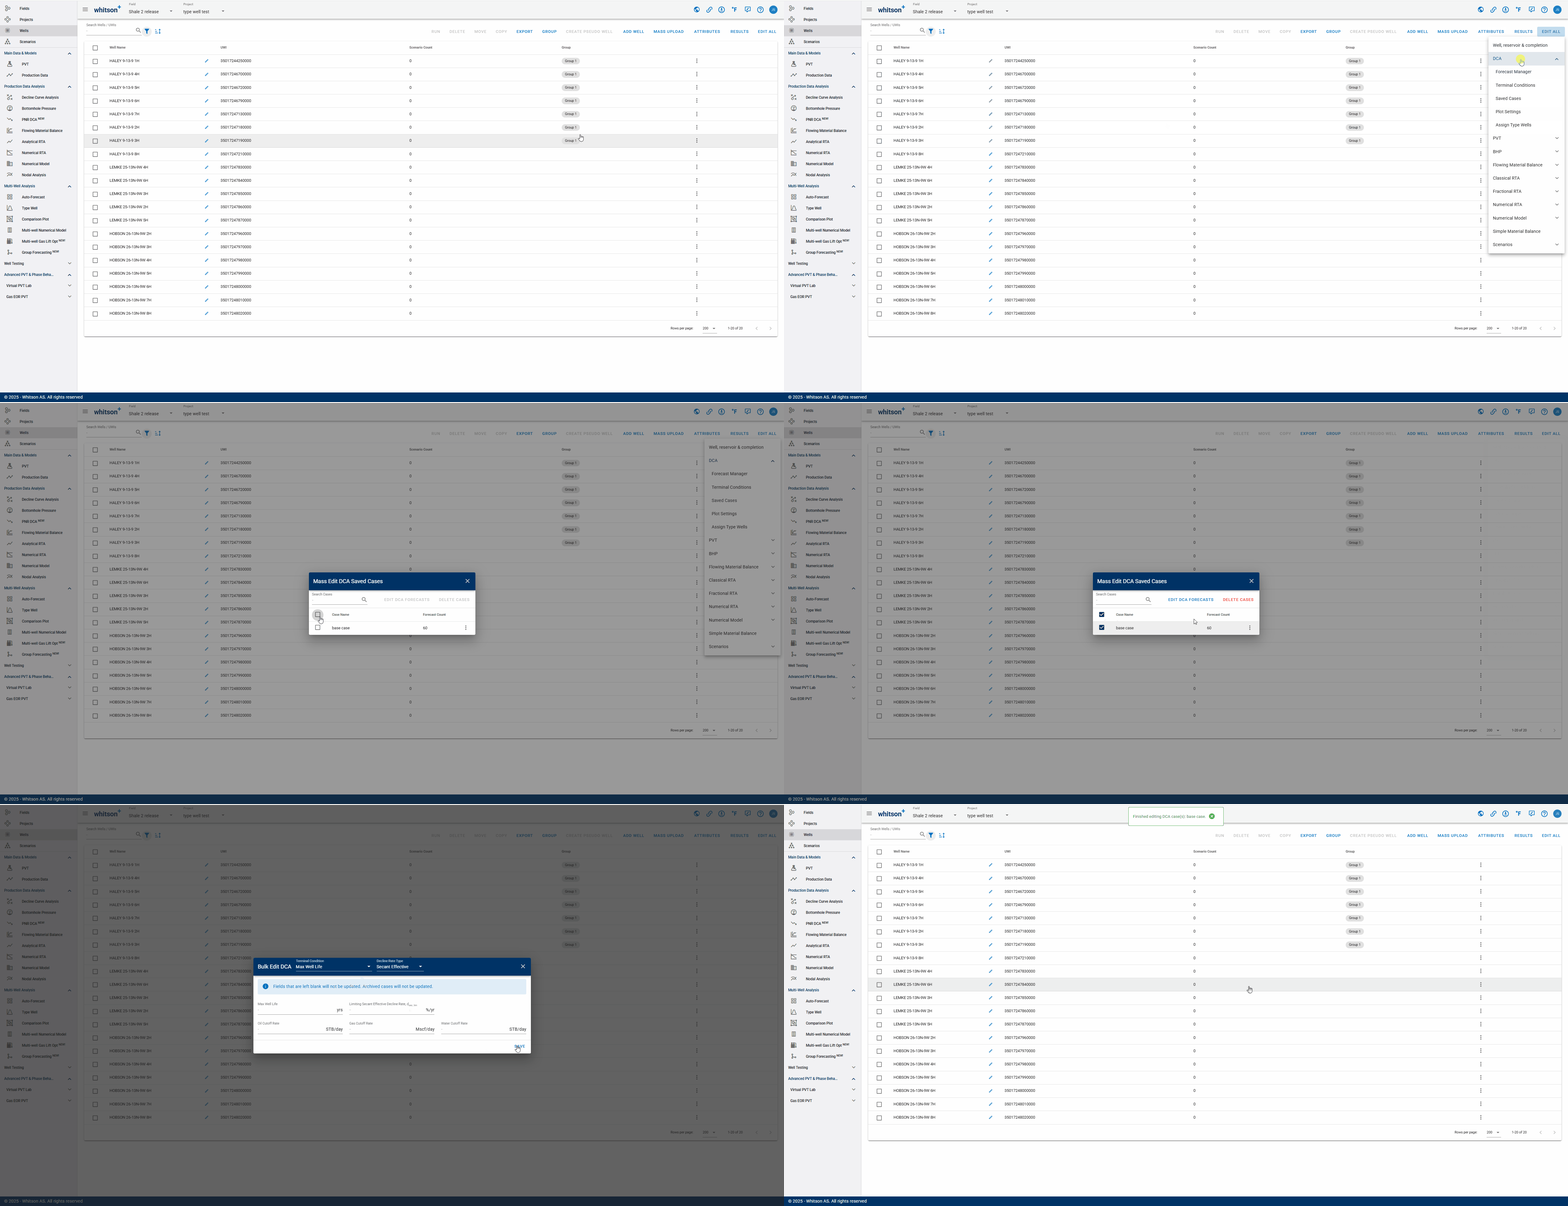
- Saved Cases: Manage previously saved cases and edit DCA forecast for each.
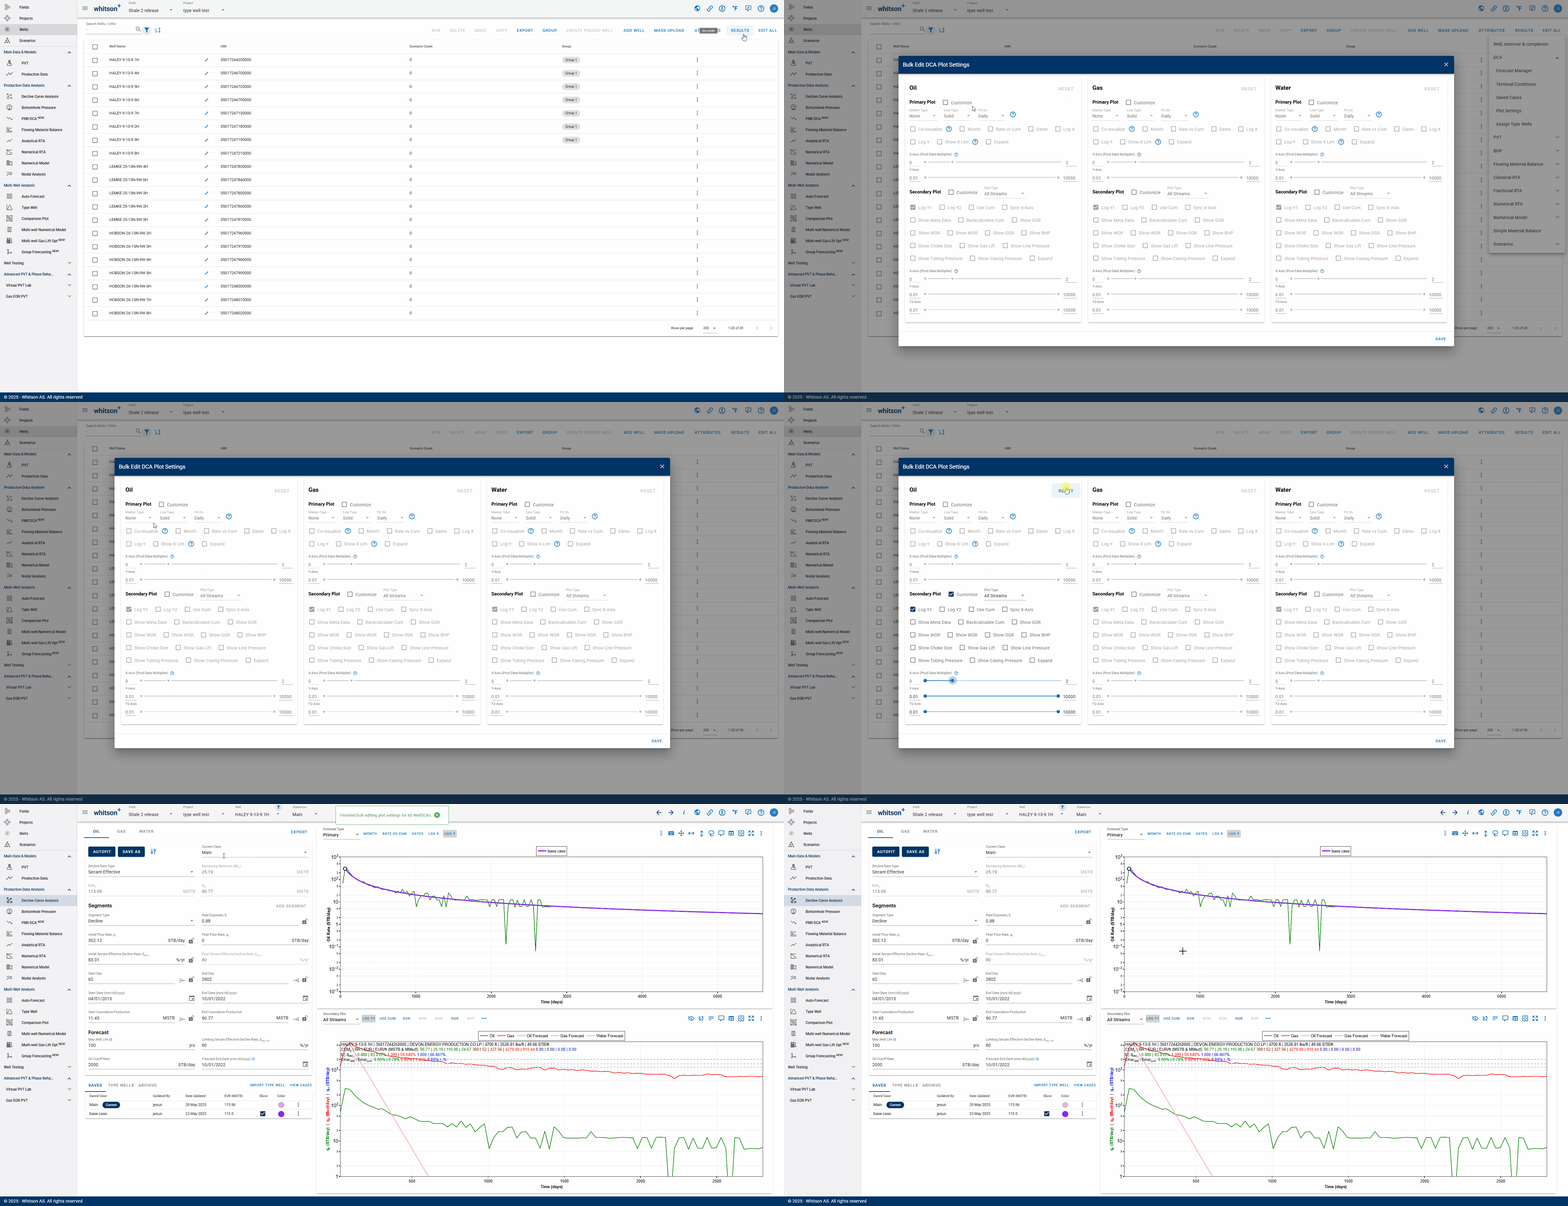
- Plot Settings: Bulk edit plot settings for all wells.
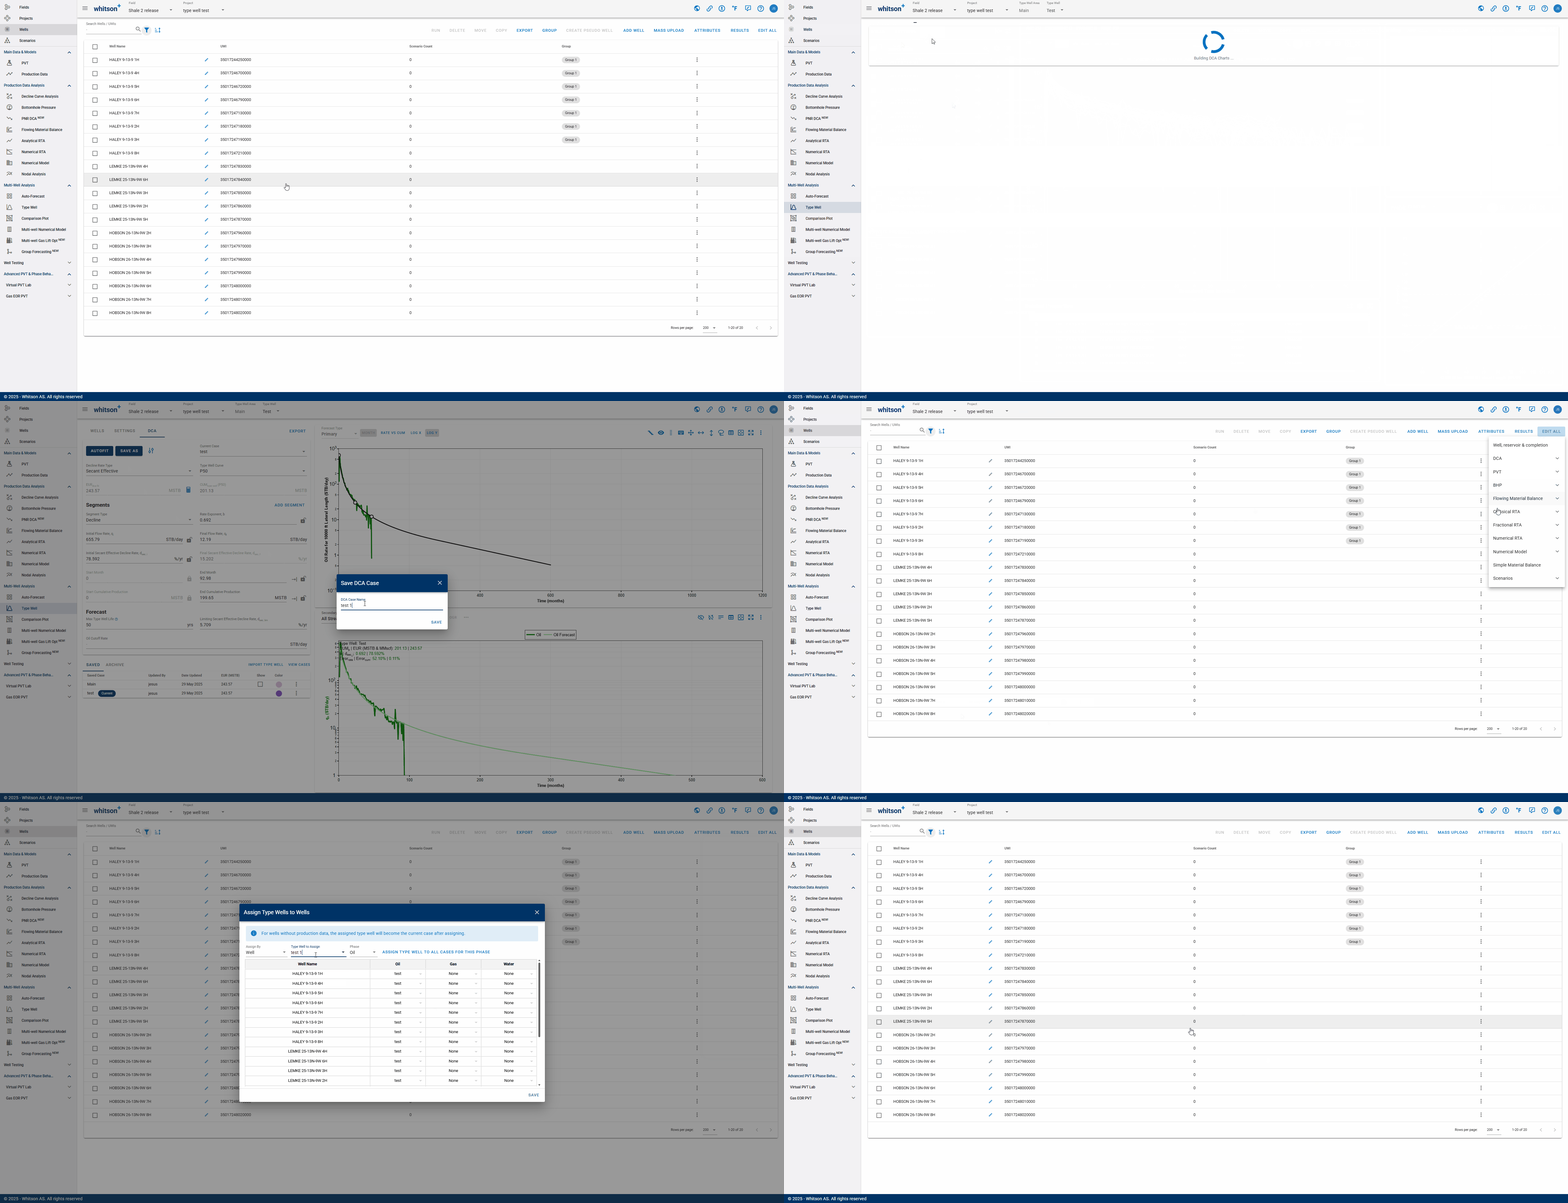
- Assign Type Wells: Previously saved DCA type wells can be assigned to any well available.
12.3. PVT
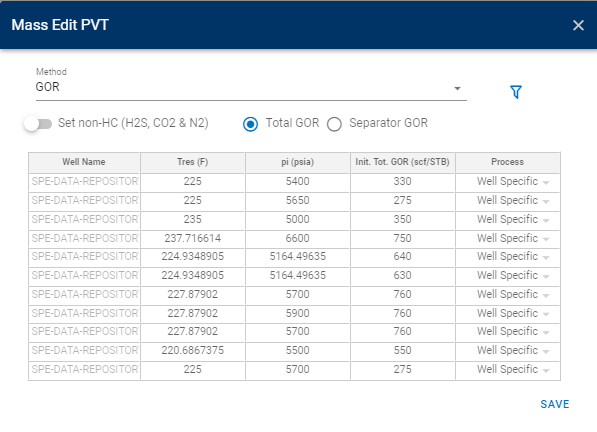
- Edit PVT Inputs: This category involves editing the PVT properties for each well independently and explicitly.
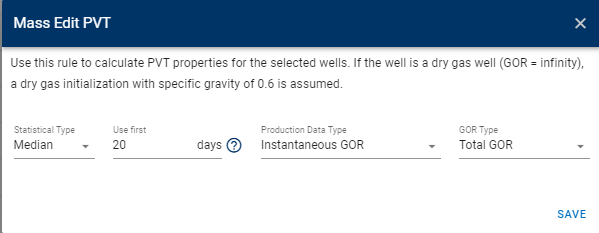
- Set GOR based on Production Data: In this category editing is performed based on mathematical rules applied to production data for multiples wells. This could involve methods such as averaging or using the median to derive a representative value for the entire group of wells.
12.4. BHP
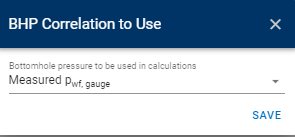
- BHP Correlation to Use: This involves bulk editing the 'BHP Correlation to Use' for all selected wells.
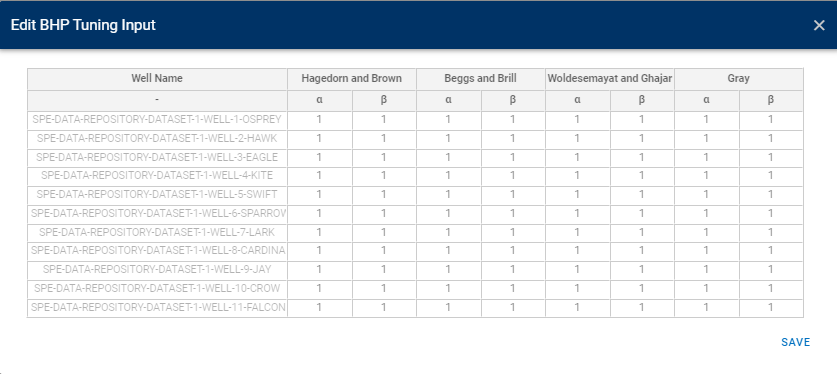
- BHP Tunning Input: Edit the 'BHP Tuning Input' parameters for the correlations of all selected wells.
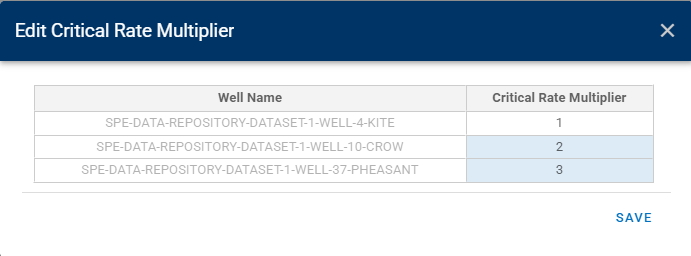
- Critical Rate Multiplier: Bulk edit the 'Critical Rate Multiplier' for each well in the project.
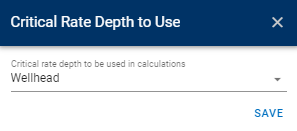
- Critical Rate Depth to Use: Set the 'Critical Rate Depth' to be used in calculations for all selected wells.
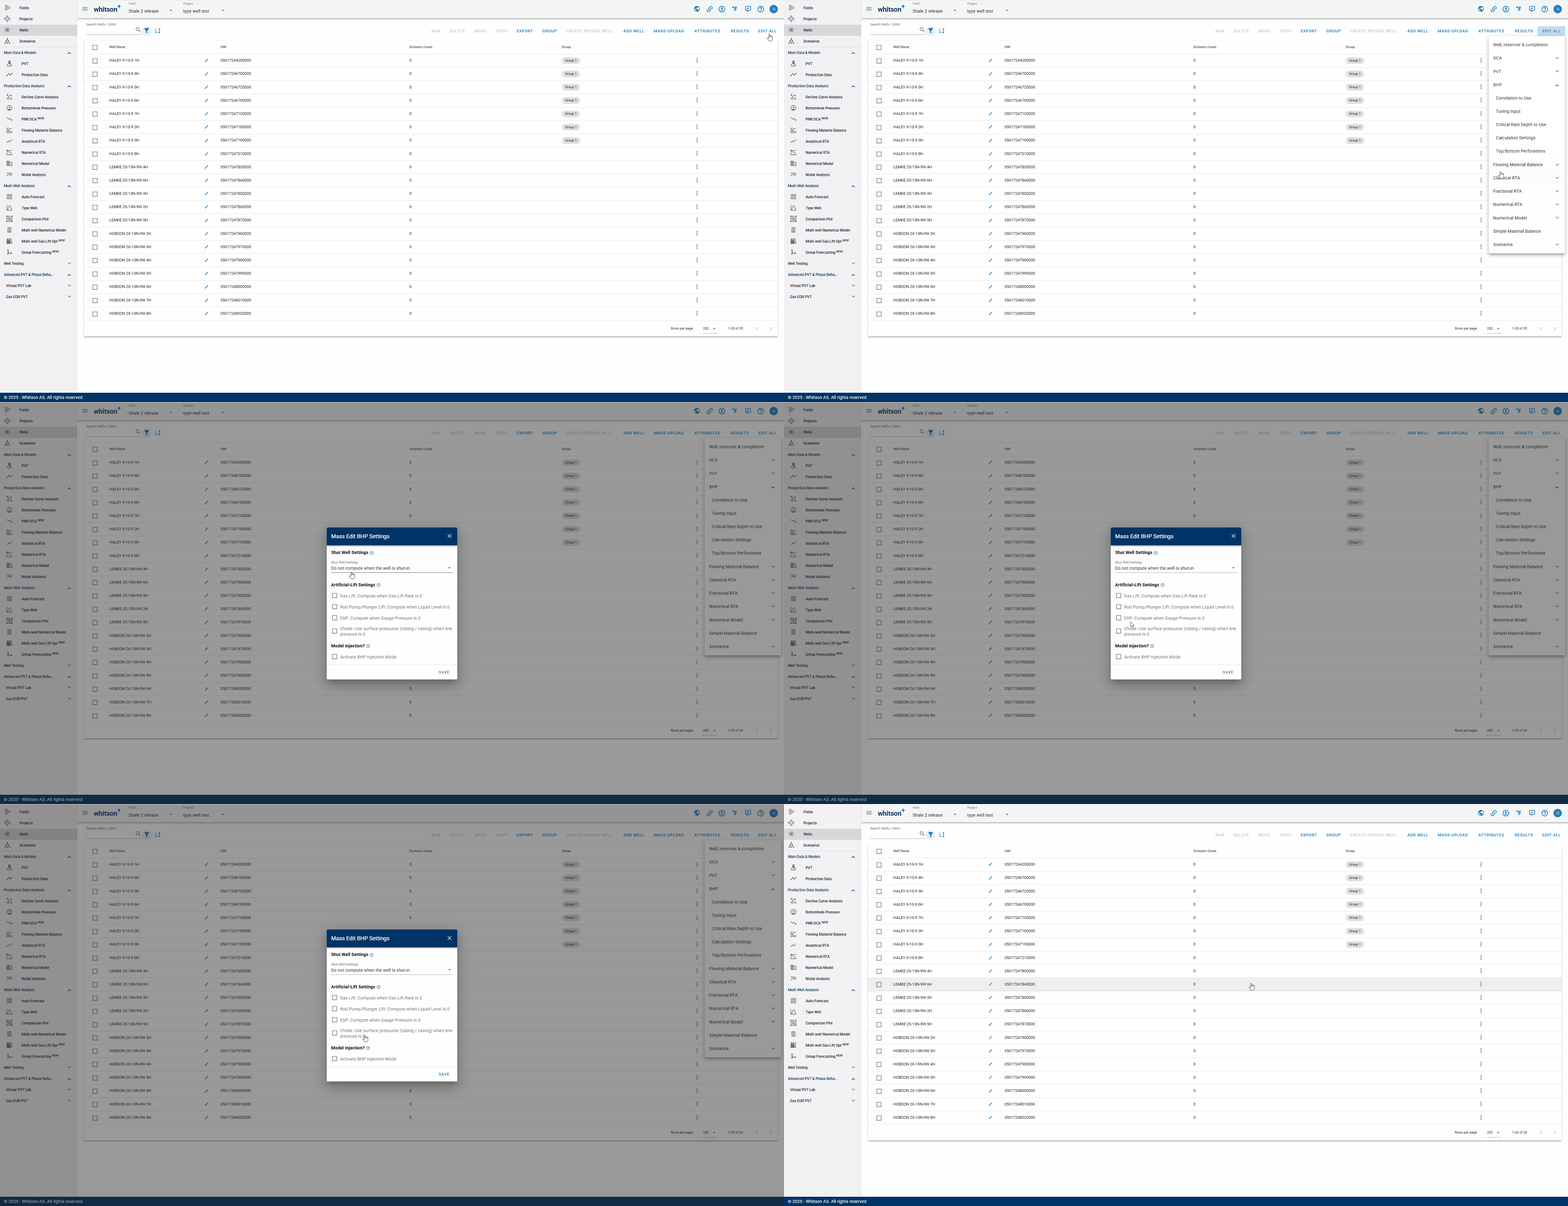
- Calculation Settings: Mass edit calculation preferences for BHP well data.
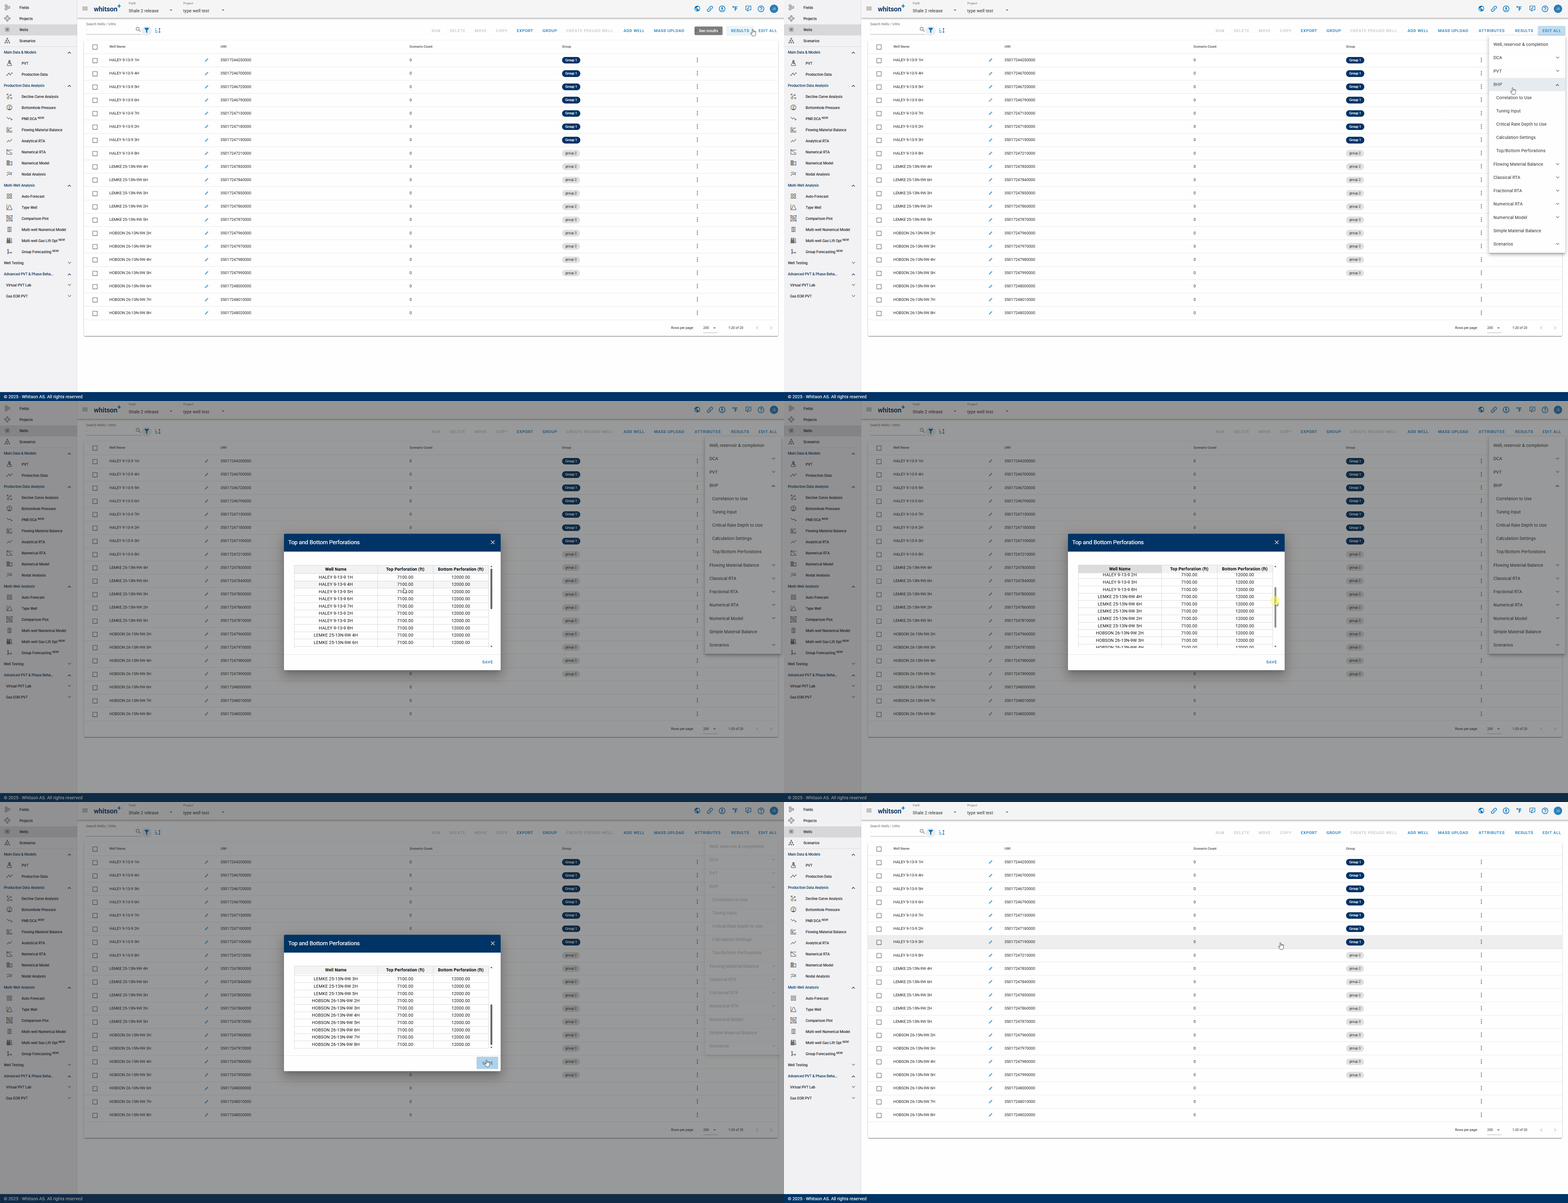
- Top/Bottom Perforations: View and edit top and bottom perforations for multiple wells.
12.5. Flowing Material Balance
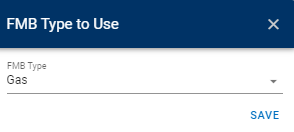
- FMB Type: Select the 'FMB Type' to be applied for all selected wells. The available options are Gas and Multiphase.
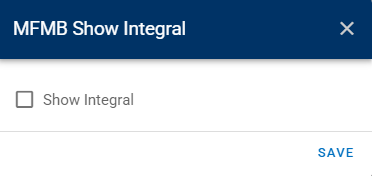
- Show Integral: Check the box to plot the integral in the FMB plot for all selected wells. A hard refresh (Ctrl + Shift + R) is required to see the changes.
12.6. Classical RTA
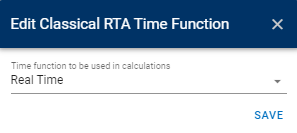
- Time Function: Edit the 'Time Function' to be used in Classical RTA calculations for the selected wells.
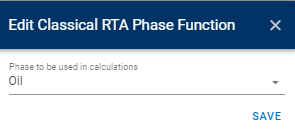
- Phase: Edit the 'Phase' to be used in Classical RTA calculations for the selected wells.
- Lock/Unlock Intercept: Lock or unlock intercept at origen in Square Root of Time Plot for all selected wells.

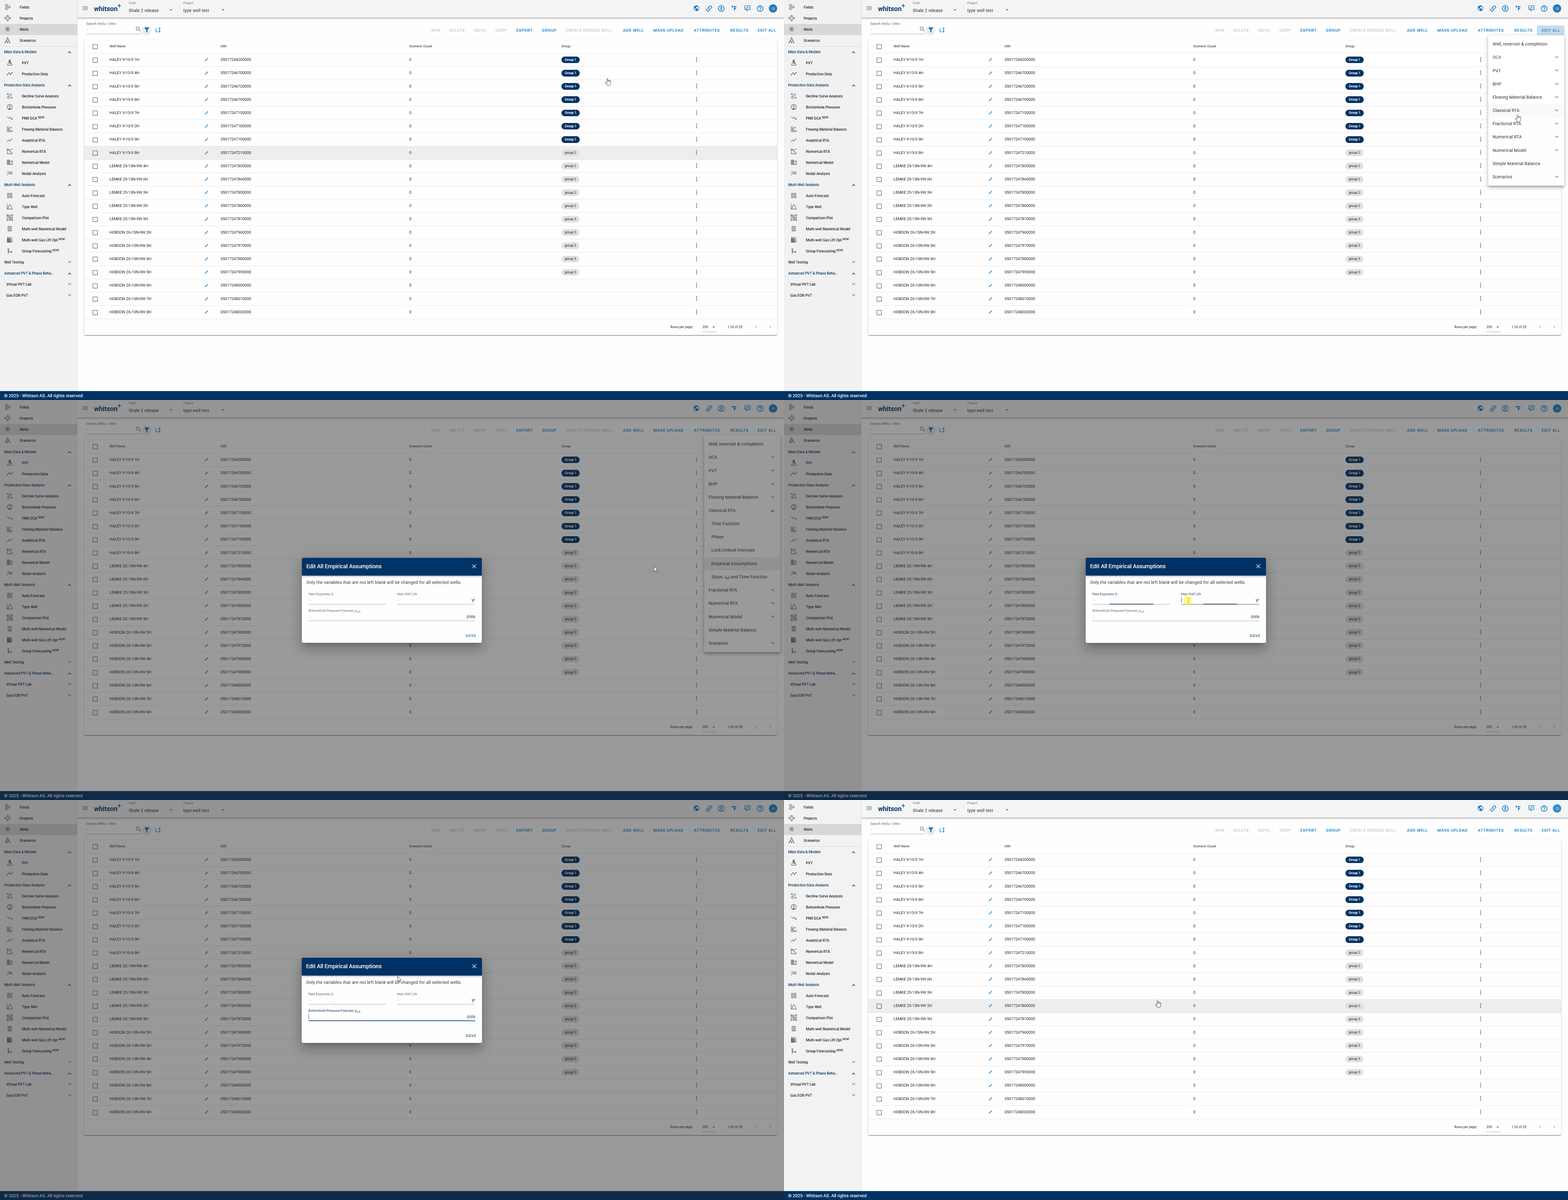
- Empirical Assumptions: Mass edit all assumptions for each well.
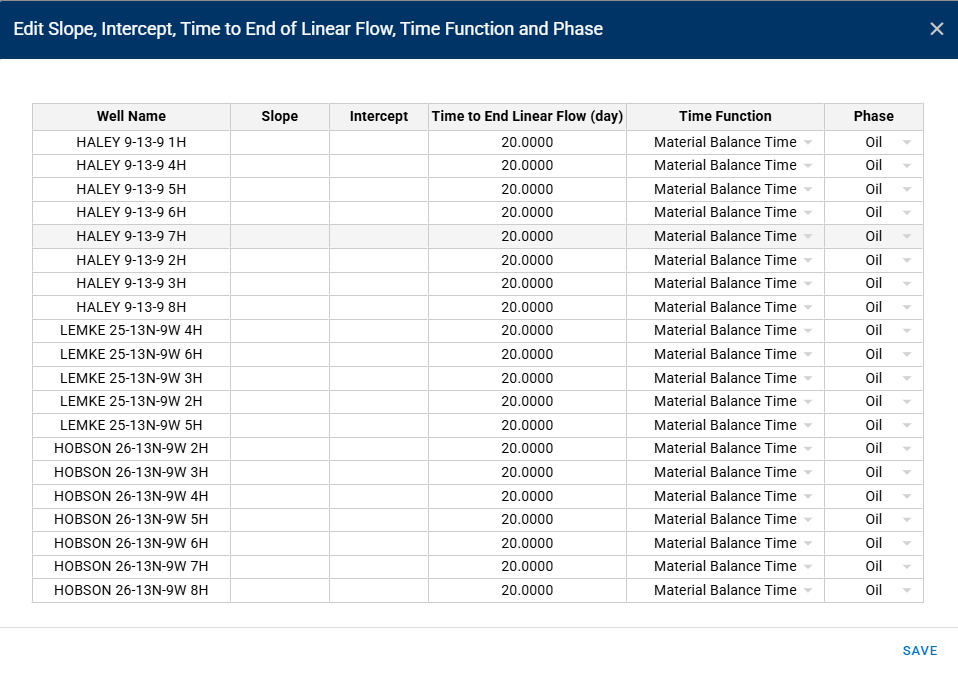
- Slope, and Time Function: Mass edit multiple classical RTA parameters for multiple wells.
12.7. Fractional RTA
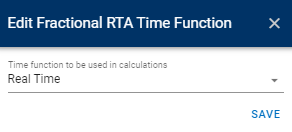
- Time Function: Edit the 'Time Function' to be used in Fractional RTA calculations for the selected wells.
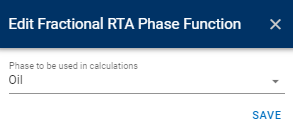
- Phase: Edit the 'Phase' to be used in Fractional RTA calculations for the selected wells.
12.8. Numerical RTA
- Input: Bulk edit reservoir properties, matrix & fracture relative permeability for the all the wells.

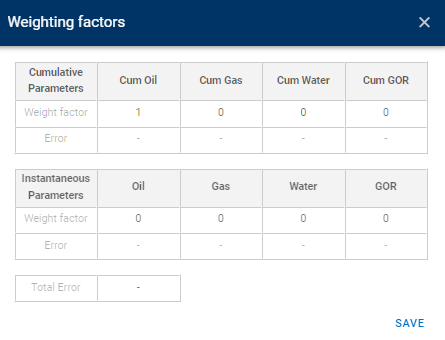
- Weight Factors: Bulk edit default weight factors (cumulative & instantaneous) for oil, gas, water, & GOR on selected wells.
12.9. Numerical Model
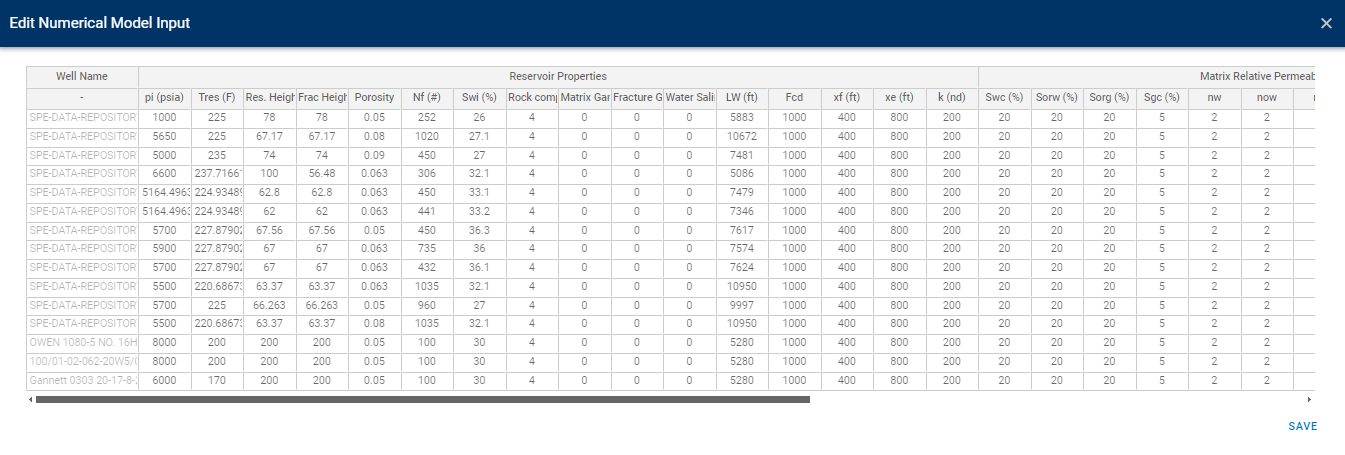
- Numerical Model Input: Bulk edit reservoir properties, matrix & fracture relative permeability for the all the wells.
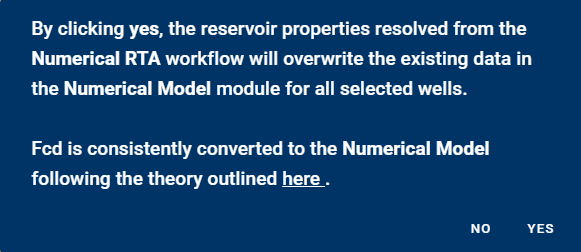
- Export Numerical RTA to Numerical Model: Analysis done in Numerical RTA can be exported to the Numerical Model tab for all wells selected here.
12.10. Simple Material Balance
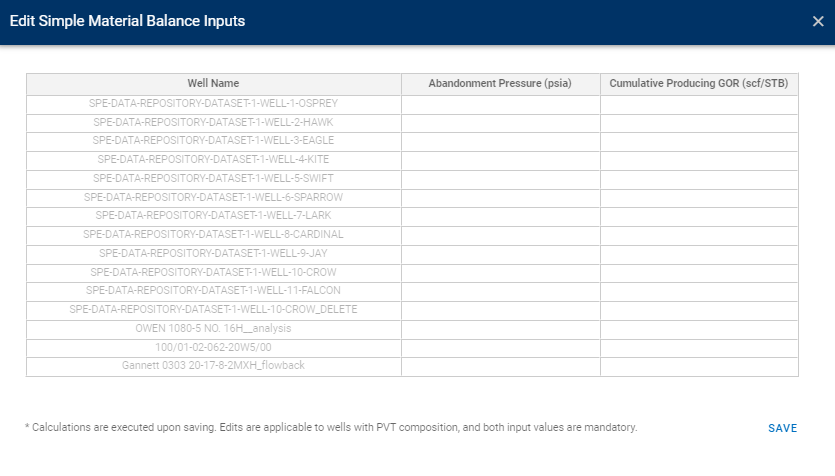
Edit Simple Material Balance Inputs (abandonment pressure and cumulative production FOR) for the selected wells.
12.11. Scenarios
- Bulk Editing Scenarios
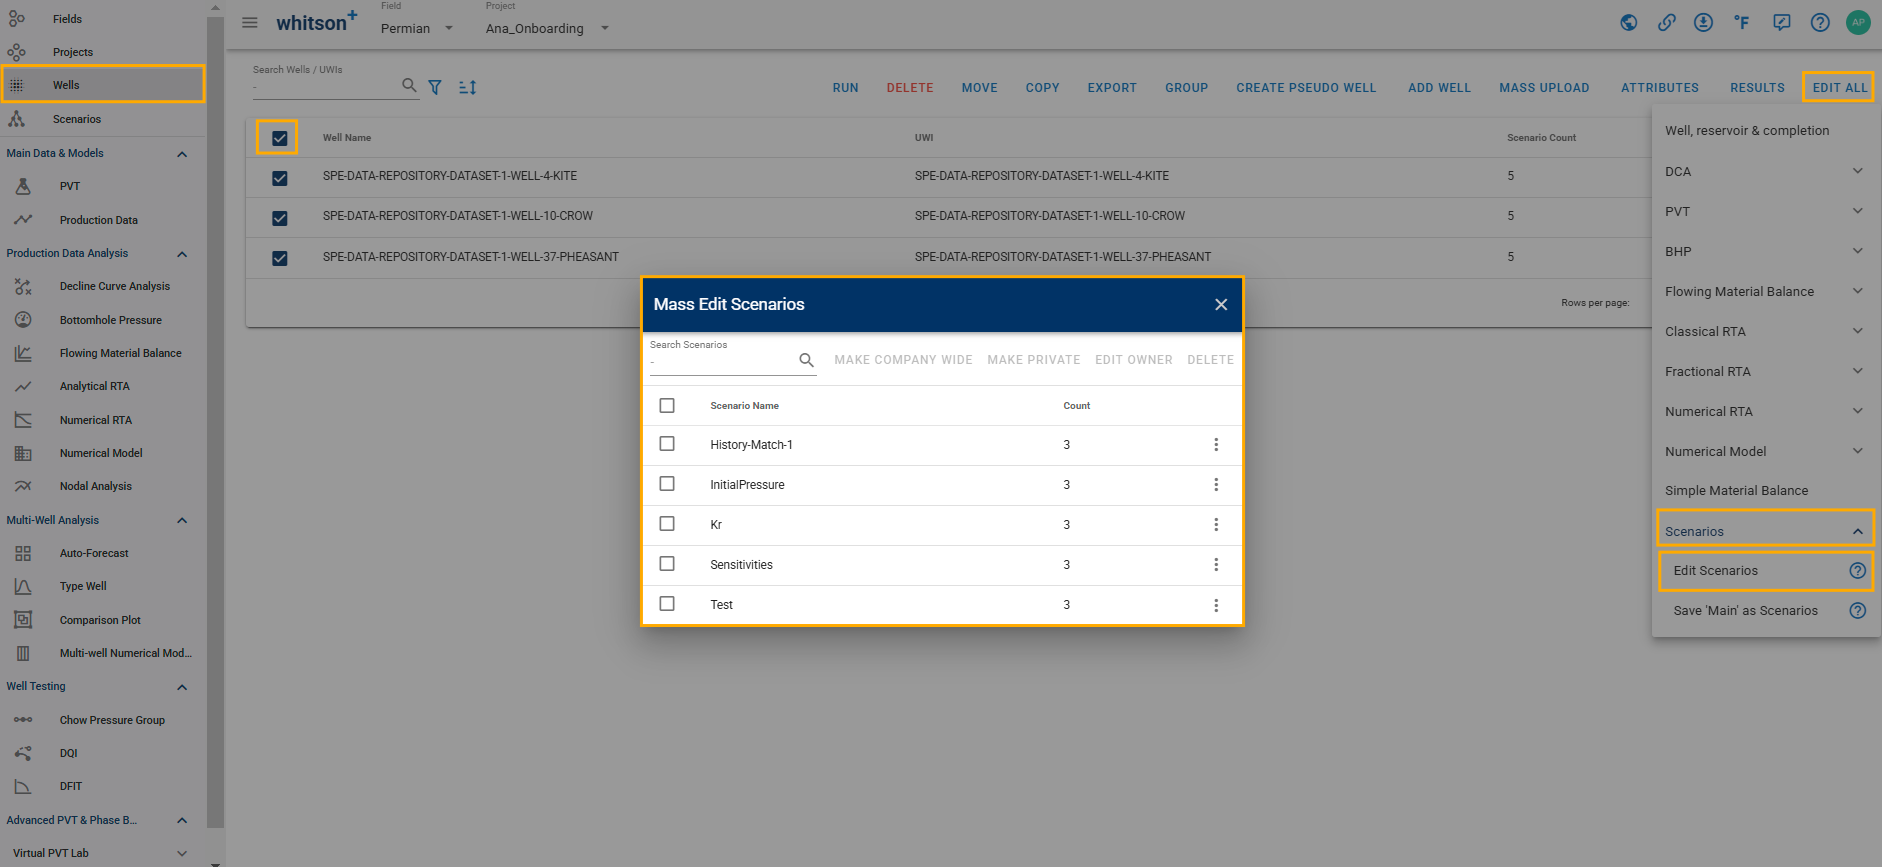
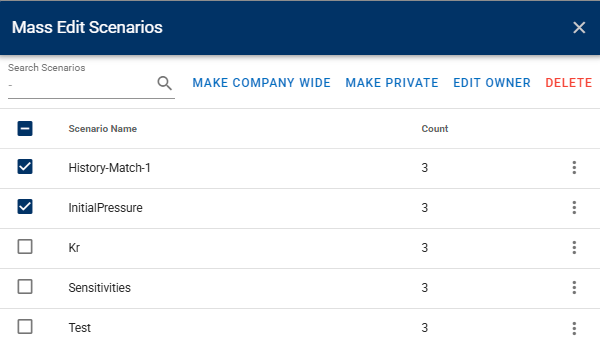
You can now "mass edit" scenarios at the project level, allowing you to change the name, owner, access type (private/company wide), and also mass delete scenarios.
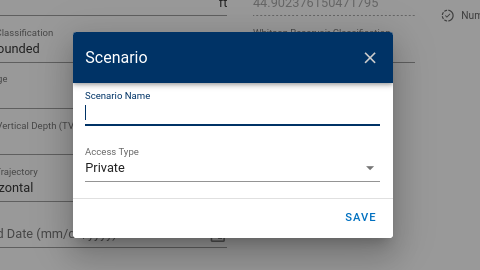
Additionally, we have added an option to specify the access type when creating a new scenario. Once you set the access type, it will remember your preference for future scenario creations.
- Creating Multiple Scenarios at Once
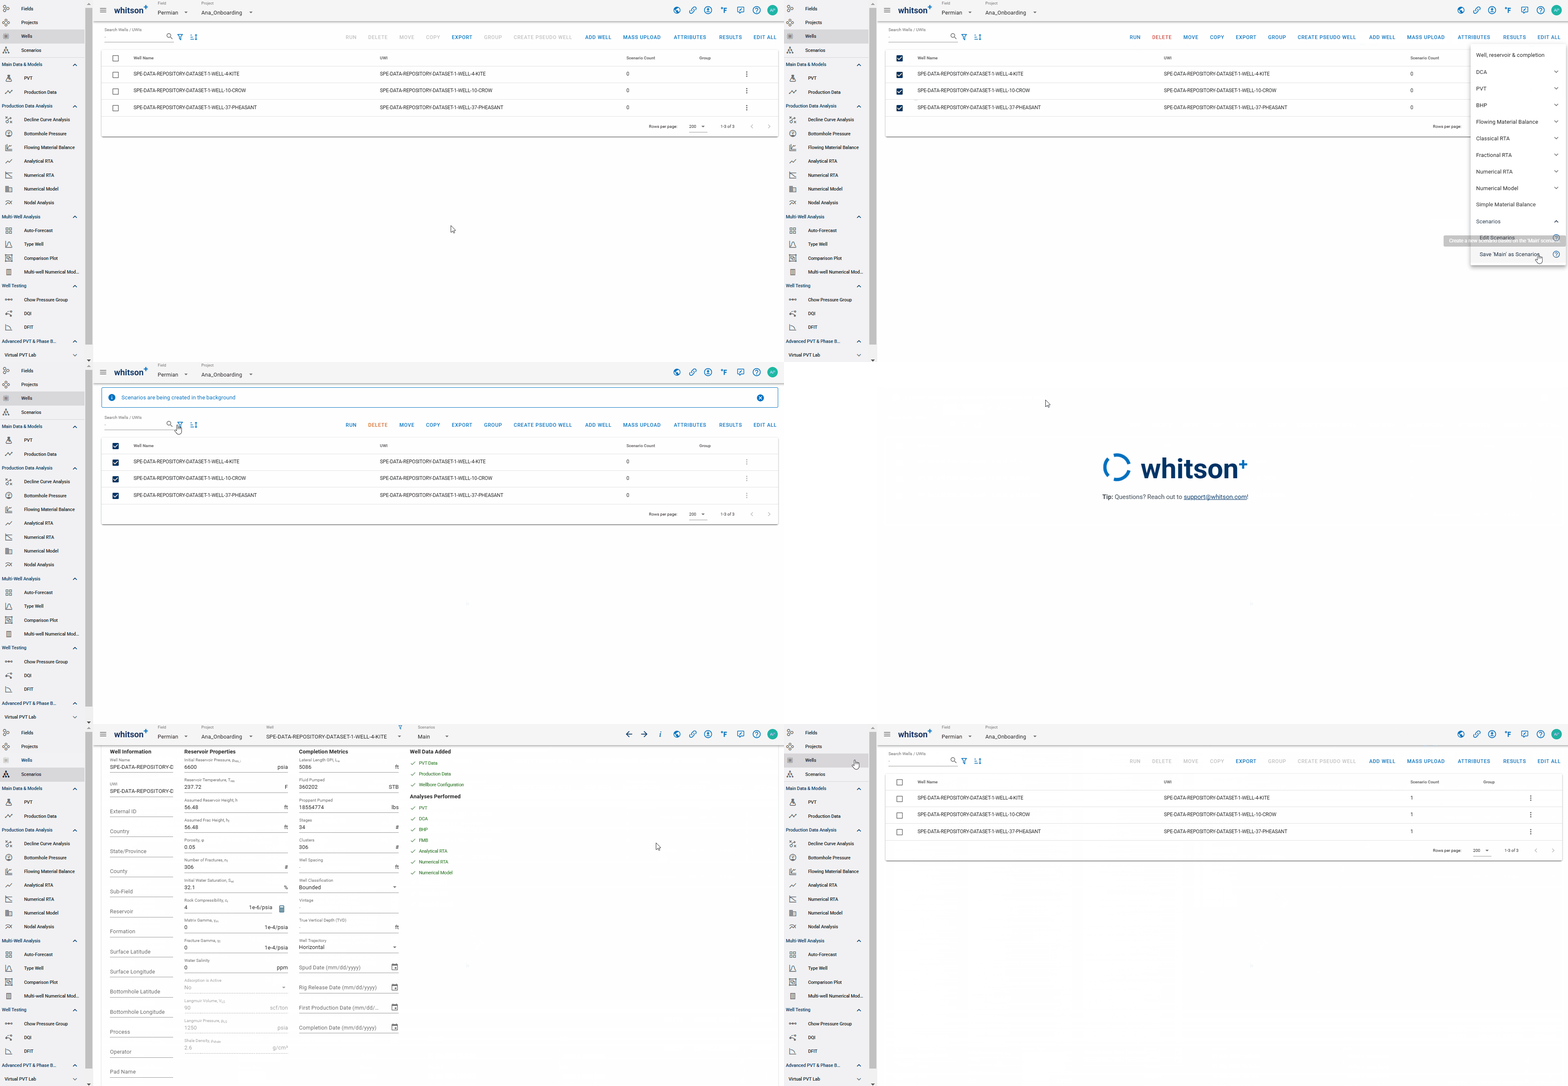
This option allows you to create multiple scenarios at once based on the 'Main' scenario for all selected wells. See gif below.
13. General Function
whitson+ now implements default input visibility, where default input numbers in the software are now highlighted in blue. This contrast helps users quickly identify values provided by the software.
